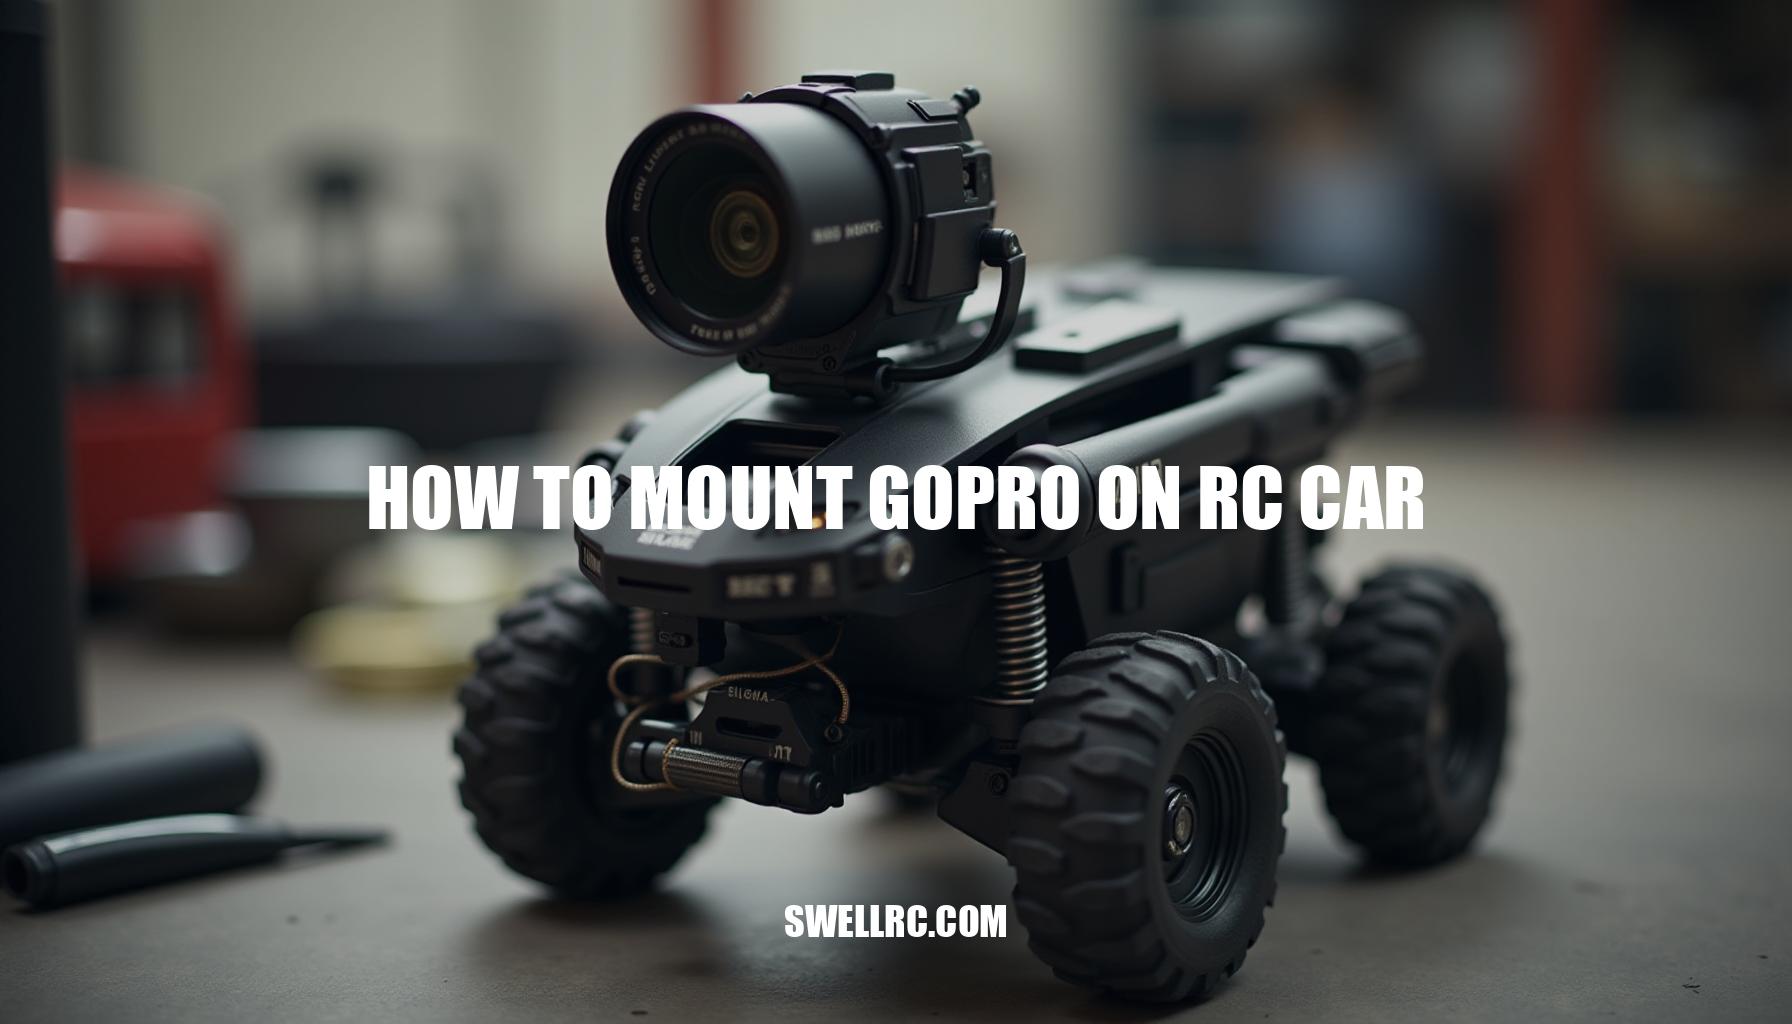
How to Mount GoPro on RC Car: A Comprehensive Guide
Imagine the thrill of seeing the ground blur by from an RC car’s eye level—the tiny pebbles popping into frame, the world tilting as the suspension loads up on every twist and turn. The rush is visceral and vivid, pulling you right into the heart of the action. I still remember the first time I strapped a GoPro to my bash truck; the footage was chaotic and shaky—but undeniably cinematic.
That initial burst of curiosity sparked weeks of experimenting with different mounts, pads, and positions to uncover stable, repeatable results. Ahead, you’ll find a hands-on, field-tested guide on how to securely mount a GoPro on your RC car, reduce vibration, and dial in settings that produce beautiful, usable footage. But before you start sticking anything down, it’s crucial to understand how RC dynamics affect your action camera mounting—this knowledge is the real unlock to mastering your RC filming setup or FPV camera setup.
Whether you’re upgrading your RC car camera rig or fine-tuning your GoPro mount, this guide has you covered for capturing the most immersive, smooth footage possible.
Understanding RC Car Dynamics Before Mounting a Camera
Why RC Physics Matter: The Impact of a 120–160 g GoPro on Your Small Vehicle
When mounting a relatively heavy GoPro, weighing between 120–160 grams, on a small RC vehicle, understanding the nuances of weight distribution and mount placement becomes essential. This added mass can significantly affect your car’s handling and the quality of your footage, making it vital to grasp the physics involved.
- Weight and Balance: Placing a substantial weight high or far from the chassis center elevates the center of gravity, risking traction rollovers or nose-dives during jumps. To optimize suspension dynamics and maintain stability, mounts should ideally be positioned low and close to the centerline.
- Sprung vs. Unsprung Mass: Cameras mounted on the body or chassis represent sprung mass, allowing the suspension to absorb road irregularities and smooth bumps. Conversely, unsprung mass mounts—such as on arms, knuckles, or bumpers—result in a dramatic feel but tend to amplify vibration and jello effects in the video.
- Speed and Terrain: Asphalt surfaces require less damping due to their smoothness, whereas dirt and grass terrains demand more isolation and secure tethers to minimize vibration. At higher speeds, wobbling and wind resistance become more pronounced. Streamlining mount profiles and angling the camera slightly downward helps reduce drag and stabilize the footage.
- Placement Changes the Story: Each mount position offers a unique perspective:
- Front bumper: aggressive and immersive angles
- Roof: panoramic cinematic shots
- Rear: follow-shots highlighting drivetrain motion and rooster tails
- Side: dynamic drifting drama
- Customize with Care: An awareness of RC car frame rigidity is key when modifying your platform. Different chassis designs influence overall stability and handling, as detailed in this build-focused primer.
- Planning for Speed: If your goal is high-velocity runs, consider lower-profile mounting strategies and prioritize stronger adhesion to keep the camera secure. For insights on creating a high-speed RC car, reference this detailed guide.
To help you make an informed decision, here’s a comparison table outlining popular mount positions along with their effects on stability, vibration, style, and crash risk:
| Mount Position | Stability at Speed | Vibration/Jello Risk | Field of View / Style | Damage Risk in Crash | Notes |
|---|---|---|---|---|---|
| Front bumper | Medium | Medium-High | Intense, immersive | High | Use flexible arm + gel pad; add safety tether |
| Hood/low front | High | Medium | Forward road feel | Medium | Great on touring cars; keep low profile |
| Roof/roll cage | Medium | Low-Medium | Wide, cinematic | Medium | Best all-rounder; watch center of gravity |
| Rear deck/wing | Medium | Medium | Self + rooster tail | Medium | Angle down 5–10° to reduce wind |
| Side mount (door/sill) | Medium-Low | High | Drift angle, wheel in frame | High | Use dual-lock + brace; avoid for speed runs |
| Inside body shell (window) | High | Low | Protected, POV | Low | Cut slot or mount behind Lexan with foam |
By carefully evaluating your vehicle’s suspension dynamics, chassis design, and desired footage style alongside the demands of your terrain, you can dramatically enhance camera stability and driving performance. Balancing these elements ensures that your RC car captures breathtaking footage without compromising handling or safety.
Choosing the Right Mounting Equipment
When selecting GoPro mount types for RC vehicles or similar applications, understanding the pros and cons of each is crucial for optimal footage and mount security. Here is a comprehensive overview:
- GoPro adhesive base with 3M VHB tape: This adhesive mount offers a clean, low-profile installation that’s extremely reliable on smooth body panels, making it ideal for roof or hood placement. Preparation with alcohol wipes ensures strong adhesion.
However, it is semi-permanent and requires heat for removal without damage.
- GoPro quick-release buckle with short arms: Facilitates fast angle changes and versatility. Keeping arms short minimizes leverage, reducing the risk of mount failure under stress.
- Industrial Dual Lock (reclosable fastener): Functions like heavy-duty Velcro but with superior strength. Perfect for testing multiple positions; always use a safety tether for added protection.
- Clamp/roll-bar mounts: Excellent for mounting on roll cages, chassis rails, or shock towers.
Be mindful of transmitted vibration; inserting a thin gel pad between clamp and tube helps dampen it.
- Magnetic mounts: Suitable only for metal chassis or cages. Must be paired with a leash to prevent loss. Also, keep magnets away from sensitive sensors or compass modules to avoid interference.
- Suction cups: Best on smooth polycarbonate surfaces but carry a risk of detachment during impacts, making them more suitable for slow, clean runs.
- Screw/plate mounts (M3/M4 hardware): Utilize existing chassis holes or body posts—do not drill into structural components.
Use blue thread locker and large washers to properly distribute load and maintain security.
- Anti-vibration solutions: Incorporate Sorbothane or gel pads, thin neoprene, TPU 3D-printed isolators, or layered foam. Focus on soft-mounting the camera cage rather than the entire body to reduce camera shake effectively.
- DIY platforms: Create low, wide bases via 3D printing or build modular LEGO risers for experimental mounting setups. These DIY mounts provide flexibility and cost-effectiveness, as highlighted in guides like the one at Swell RC.
- Protecting the shell and finish: Apply clear protective films or painter’s tape under adhesives to preserve body finish.
Basic body repair and touch-up techniques can be learned here.
Buying pointers: Favor mounts equipped with metal thumbscrews, short arms, and low stack heights. Keep your toolkit stocked with 3M VHB tape, alcohol wipes for prep, safety tethers such as fishing line or Kevlar cord, and spare buckle bases to ensure readiness and adaptability.
Step-by-Step Guide – How to Mount a GoPro on an RC Car
When learning how to mount a GoPro effectively on your RC car, having the right tools and materials is essential for achieving great footage and ensuring camera stability. You will need a GoPro equipped with a protective lens cover, base buckle, and a short arm; optionally, a cage with tether points enhances safety. Common adhesives include 3M VHB and Industrial Dual Lock, complemented by surface prep essentials like isopropyl alcohol wipes and a microfiber cloth to ensure optimal adhesion.
To mitigate vibrations, gel or foam pads such as Sorbothane, neoprene, or TPU isolators prove invaluable. For mechanical fastening, M3 hardware, washers, and low-strength thread locker come in handy, especially when utilizing screw plates. Additionally, safety tether components such as zip ties, soft straps, or safety tether lines are crucial, alongside painter’s tape to protect paint during installation.
Small levels or phone level apps assist with proper alignment, while hex drivers help with assembly.
The following step-by-step method outlines how to attach the camera to your RC car with precision and care:
- Choose the shot: Decide between mounting on the bumper, hood, roof, rear, or inside window based on the narrative you want to capture and refer to your shot selection table.
- Dry fit: Mock up the camera including the battery door and SD card to verify no interference with tires, body travel, or steering range.
- Surface prep: Clean the mounting area with isopropyl alcohol wipes. Optionally, apply a layer of painter’s tape or clear protective film to preserve paintwork during adhesion.
- Add damping: Insert a thin gel or foam pad beneath the mount footprint to effectively reduce high-frequency vibrations.
- Apply the base: For 3M VHB, warm both mounting surfaces slightly, press firmly for 30–45 seconds, and wait 12–24 hours to achieve full bond strength. If using Dual Lock, ensure adhesive is applied on both surfaces and press together to secure engagement.
- Keep it low and short: Use the shortest possible mounting arm; longer arms may look appealing but increase wobble and wind resistance.
- Align the horizon: Utilize a small level or phone app to ensure the camera is level horizontally. Angle the camera slightly downward (5–10°) to lessen wind load and include the ground plane in your shot.
- Secure a safety tether: Attach a short leash from the camera cage to a sturdy chassis point to prevent loss in case of mount failure.
- Cable management: If powering externally, use zip ties to strain-relieve cables and avoid any flapping leads that can cause distractions or damage.
- Balance check: With the car body mounted, lift the vehicle at the center to ensure weight distribution is balanced. Adjust mount placement as necessary to avoid uneven load.
- Short shakedown: Drive the car 10–20 meters on the intended terrain and review footage for any wobble or rattles. Retighten hardware if needed.
- Lock it in: Once satisfied, mark the mount position with a small piece of tape for repeatable placement.
For more comprehensive methods of how to mount a GoPro and variations specific to different RC platforms, this guide is a valuable resource: How to attach a camera to an RC car.
Troubleshooting quick fixes include:
- Jello wobble: Improve damping by adding or changing your gel pad; use shorter arms; switch to Linear Field of View (FOV); or lower shutter speed with an ND filter.
- Mount creeping or lifting: Enhance surface prep procedures; opt for 3M VHB adhesive; or incorporate a mechanical strap wrapping around the chassis.
- Car handling worsened: Position the camera nearer the centerline and lower on the body; consider stiffening springs one rate or adding preload incrementally.
Testing, Adjusting, and Improving Footage Quality
Effective vibration reduction during field testing of RC car footage requires a systematic approach. To begin, testing footage with a slow-motion review is key: run 10–20 second clips over varied surfaces such as asphalt, dirt, and grass to identify issues like jello, rolling shutter, or resonance. When making adjustments, isolate variables by changing only one factor per run—be it pad thickness, angle, position, or tire choice—to accurately measure impact.
- RC car gyro: Incorporating an electronic steering gyro helps stabilize twitchy steering and mitigates sudden yaw that negatively affects shot smoothness.
This electronic assist is crucial for maintaining control over sudden movements.
- Tire tuning: Selecting softer tire compounds paired with properly glued beads and balanced wheels absorbs surface chatter. Knowing DIY tire tuning techniques can further enhance shock absorption.
- Shock absorption: Regular drivetrain maintenance—checking gear mesh, lubricating bearings, tightening body clips, and securing batteries—limits rattles interpreted as shake. Adjusting suspension with thicker shock oil or slightly stiffer springs slows unwanted oscillations, ensuring that shocks are bled evenly for consistent damping.
- Camera settings: Use higher frame rates (60–120 fps) with Wide or Linear field-of-view settings, locking white balance and ISO to avoid flicker.
Testing in-camera digital stabilization on and off helps find the optimal balance; often, combining physical damping with mild electronic stabilization yields the best results. Adding ND filters to target a 1/120–1/240 shutter speed at 60–120 fps produces natural motion blur that softens micro-vibrations.
- Editing stabilization: In post-production, applying gentle stabilization while cropping sparingly preserves frame integrity. Enhancements such as denoising dusty footage and fine-tuning contrast further polish the visual output.
- Circuit board and power upgrades: Enhancing power delivery and throttle mapping reduces jolts during acceleration.
For electronics enthusiasts, custom circuit board projects can tailor performance precisely.
- Remote sync: Proper pairing of transmitter and receiver combined with tuning of exponential and dual rates ensures smoother control inputs, critical for controlled steering and throttle response during shooting sessions. Detailed instructions can be found here.
Creative Filming Techniques and Fun Projects
To keep your creative RC filming fresh and engaging, consider experimenting with various character builds by creating themed rigs and tiny worlds. If you love miniatures, you’ll appreciate converting models into drivable camera platforms; for example, transforming a Hot Wheels car into an RC vehicle offers a unique FPV camera setup experience (Learn more here).
Exploring different camera angles can dramatically enhance your footage. Try front bumper wheel-in-frame shots to convey speed, rear low mounts for capturing dynamic rooster tails, inside-window POV perspectives for a cockpit feel, and side mounts for showcasing impressive drifts.
Multi-cam edits elevate your storytelling by combining a roof wide shot with a bumper close-up, using match-cut corners from both perspectives to maintain viewer engagement.
Incorporate chases and reveals by employing a second RC car as a camera chase vehicle, coordinating passes and braking points for cinematic effect.
Lighting plays a crucial role; shooting during golden hour helps flatten harsh shadows, while day-to-night time lapses of the pit setup add dramatic flair. Paying attention to camera settings enhances image quality—opt for 4K60 to capture fast action smoothly, use linear/horizon leveling on the roof mount, wide-angle lenses on the bumper, apply a flat color profile for easier post-processing grading, and lock shutter/ISO when using ND filters for consistent exposure.
Finally, prioritize safety and storytelling: always tether your rigs to avoid accidents, rehearse lines to ensure clarity, and incorporate ambient sound of gears and gravel to immerse your audience fully in the RC racing environment.
Conclusion – Bringing Cinematic RC Footage to Life
Recapping the journey to achieving cinematic RC footage, the key steps start with understanding the underlying physics. Selecting a low, strong mount with real damping is crucial for enhancing camera stability. From there, a careful and precise installation sets the foundation for success.
Iterative testing and fine-tuning unlock the full potential of your RC filming setup, enabling shots that transform tiny cars into lifelike, full-scale machines.
The biggest lessons gained from extensive trial and error include:
- Keeping mounts short and low to minimize vibrations
- Employing soft-mount techniques thoughtfully to absorb shocks without compromising stability
- Managing steering input to reduce camera shake during maneuvers
- Trusting tires and suspension components to handle terrain challenges effectively
Embracing experimentation fuels creative freedom and pushes the boundaries of what’s possible with your gear. So, mount up, experiment boldly, and share your best angles with the community—because sometimes the next groundbreaking shot is only a few millimeters away.
Frequently Asked Questions
- What is the best way to mount a GoPro on an RC car?
Use a low-profile GoPro adhesive base or screw plate on a clean, flat part of the body (roof/hood), add a thin gel pad for damping, keep arms short, and always add a safety tether. This balances stability, safety, and repeatable framing. - How do you keep the GoPro stable on rough terrain?
Soft-mount the camera with gel/Sorbothane under the base, shorten the lever arm, choose softer balanced tires, thicken shock oil slightly, and consider a steering gyro to reduce sudden yaw. Test and tweak one variable at a time. - What kind of mount works best for high-speed RC cars?
A short, low-profile adhesive or screw-in mount on the hood/roof near the chassis centerline works best. Avoid tall arms and side mounts; angle the camera down 5–10° to reduce wind load and keep the horizon steady. - Can you use GoPro adhesive mounts on RC cars?
Yes—GoPro bases with quality 3M VHB work very well on clean, smooth polycarbonate. Warm the surfaces, press firmly, and let the adhesive cure 12–24 hours. Add a tether for impact safety and a protective film under the base if you’re worried about paint. - How do you reduce camera shake on your RC car footage?
Combine physical damping (gel pads/foam) with smart placement (sprung mass, low/centered), balanced tires, tidy drivetrain, and appropriate camera settings (higher fps, moderate stabilization, ND filters for proper shutter). - How do you attach a camera to an RC car without damaging it?
Protect the paint with clear film or painter’s tape, use existing holes/body posts with washers for screw mounts, prefer removable Dual Lock for testing, and avoid drilling structural parts. Always use a short safety tether instead of overtightening mounts.