How to Break In a Brushed RC Car Motor: A Step-by-Step Guide
After testing motor after motor on my bench and at the track, the single cheapest “mod” that consistently gave me smoother throttle and snappier launches was a proper break-in. Breaking in a brushed RC car motor simply means running it gently under controlled conditions so the carbon brushes conform to the curve of the copper commutator. That seating reduces friction and electrical resistance, which cuts heat, improves current flow, and makes your motor feel freer and more responsive.
In this guide, I’ll show you the two proven methods for the motor break-in process—the classic water break-in and a careful dry break-in—along with exact voltages, times, and safety steps to ensure reliable results without risking your gear. Proper RC car motor maintenance and brushed motor care are essential for electric RC tuning that aims to improve acceleration and deliver smoother throttle response every time you race or practice.
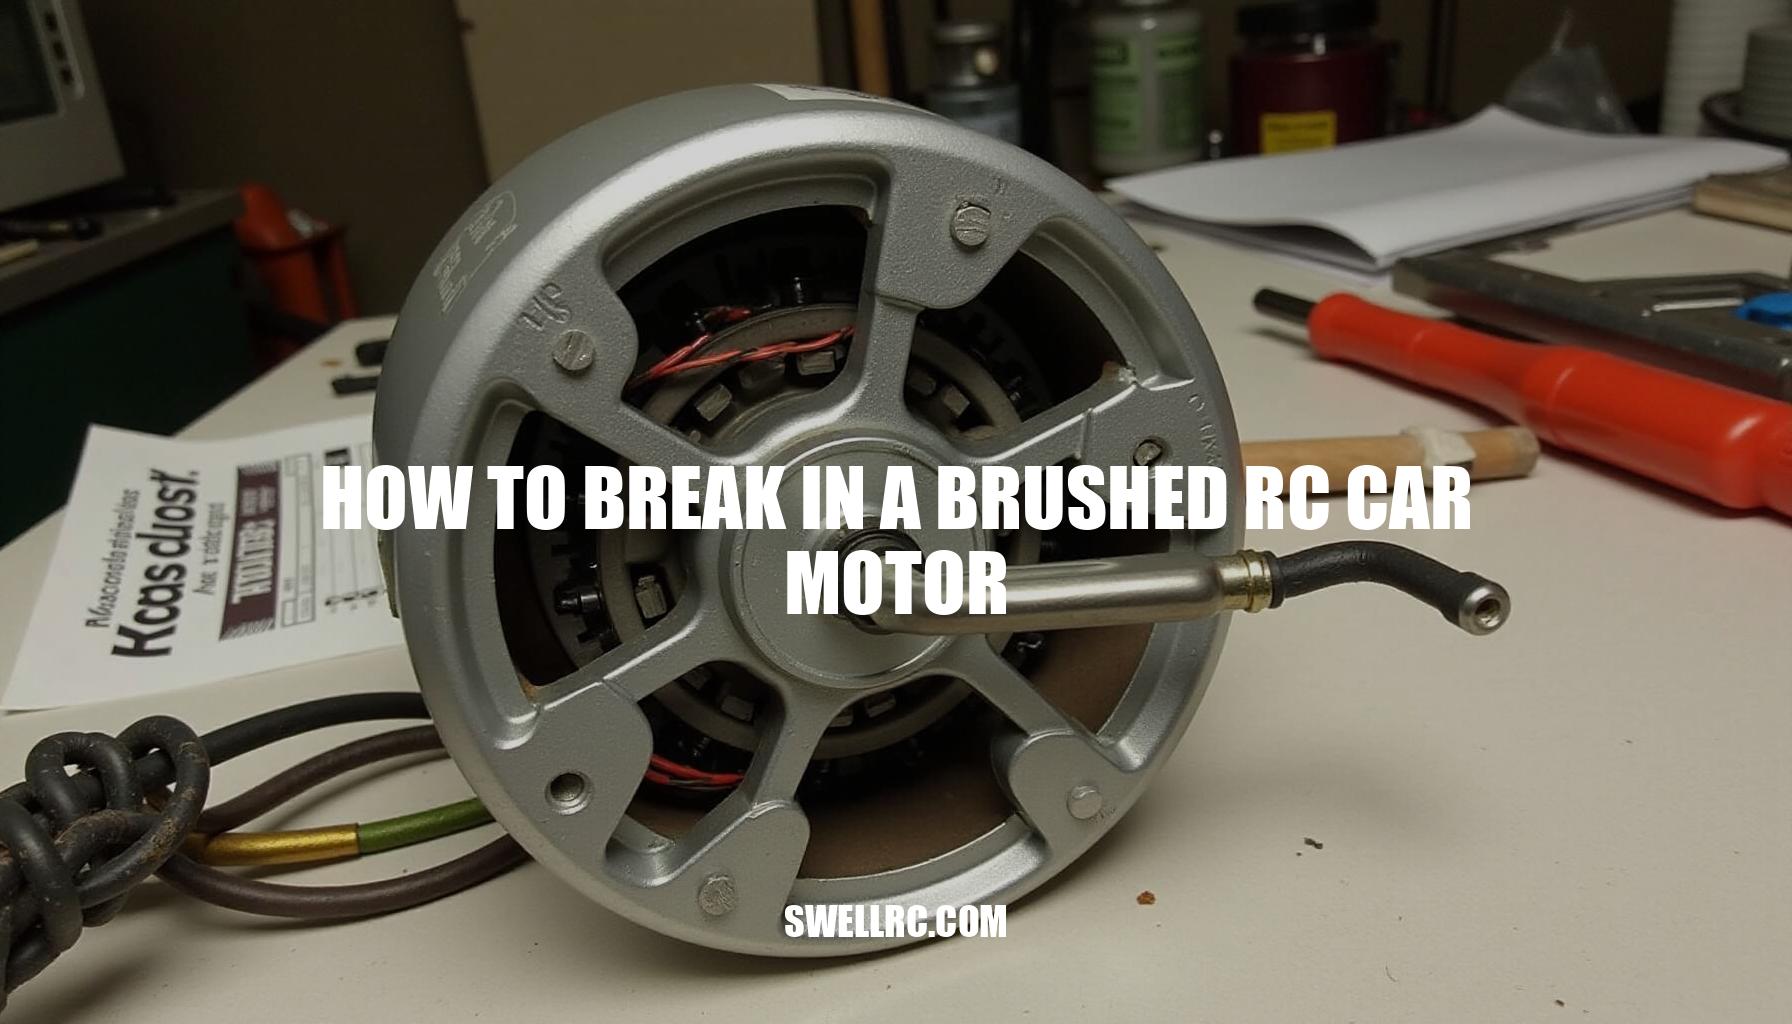
Understanding the Brushed Motor: The Heart of Every RC Car
Think of a brushed motor as a small team working in harmony:
- Armature (rotor): The spinning core wrapped in copper windings that generates torque.
- Commutator: A segmented copper ring mounted on the armature shaft that directs current flow.
- Motor brushes: Carbon blocks pressing against the commutator, feeding power into the windings.
- Magnets: Positioned within the motor can to provide a magnetic field for the energized windings to push against.
When you first power up a new motor, the flat faces of the brushes only contact a small, curved area of the commutator. During the break-in period, the brush seating process polishes these faces into a matching arc. This increased contact area reduces arcing and lowers internal resistance, which results in less heat generation and more usable power.
| Feature | Brushed Motor | Brushless Motor |
|---|---|---|
| Complexity | Simple design with commutator and brushes. | More complex electronics, no brushes or commutator. |
| Maintenance | Requires regular brush and commutator maintenance. | Maintenance-light, no brushes to replace. |
| Efficiency | Lower efficiency due to friction and arcing. | Higher efficiency with better power delivery. |
| Control | Direct current flow controlled mechanically. | Electronic speed controller (ESC) needed for precise control. |
Understanding the differences in brushed vs brushless motors is important for choosing the right technology for your application.
If you’re planning future upgrades or comparing technologies, keep in mind that brushed motors offer simplicity and affordability but require periodic maintenance of motor brushes and the commutator. On the other hand, brushless motors deliver higher efficiency and reduced maintenance, provided you use appropriate ESC pairing to manage current flow effectively.
For those interested in transitioning to brushless technology, check out our detailed guide on how to choose a brushless motor for RC car.
Before You Start: Tools, Voltages, and Safety
When preparing your workbench for motor maintenance and break-in, you’ll want to ensure you have several essential items at hand to optimize the process and maintain safety precautions. First, a low voltage power supply is crucial; a bench supply with a current limit is ideal, though a 2x AA holder (~3 V) can suffice. To monitor the no-load current, a multimeter is optional but highly recommended.
Proper temperature monitoring is essential to keep the motor can under approximately 60 °C (140 °F), so a thermometer or IR temperature gun should be available. For water break-in methods, distilled or deionized water along with a cup or jar is necessary. Additionally, having contact cleaner or 99% isopropyl alcohol and compressed air helps ensure cleanliness.
After cleaning or water exposure, applying a drop of light bearing oil per bearing or bushing prolongs motor life. Finally, keep safety precautions in mind by wearing safety glasses and using paper towels to manage spills.
- Low‑voltage power source (bench supply with current limit is best; or 2x AA holder ~3 V)
- Multimeter (optional) to watch no‑load current
- Thermometer/IR temp gun (keep the can under ~60 °C / 140 °F)
- Distilled or deionized water (for water method), a cup or jar
- Contact cleaner or 99% isopropyl alcohol, compressed air
- Light bearing oil (one drop per bearing/bushing after)
- Paper towels, safety glasses
For 540-size sealed cans, target settings typically range from 1.5 to 2.5 V at 0.3 to 0.8 A for water break-in, and 2.0 to 3.0 V for dry break-in. Always operate with no load — no pinion or wheels attached.
If your motor includes ball bearings, remember to re-oil immediately after any water exposure to maintain optimal performance.
Water vs. Dry: Which Break-In Method Should You Use?
Both the water break-in method and the dry break-in method work effectively for motor preparation. The choice between these two depends largely on the tools needed, your patience, and the specific motor type you are working with. To help you decide, here’s a quick comparison highlighting key factors like efficiency, time, and risk associated with each method.
| Method | Efficiency | Time Required | Risk Level | Tools Needed |
|---|---|---|---|---|
| Water Break-in Method | High – ensures thorough lubrication | Moderate to Long – requires monitoring | Low – safer due to cooling effect | Water source, container, and basic measuring tools |
| Dry Break-in Method | Moderate – relies on initial motor design quality | Short – quicker process | Moderate to High – potential for overheating | Minimal – mostly requires motor operation controls |
Assess your available tools and the motor’s specifications before choosing between the water break-in method and the dry break-in method. This way, you can optimize for both efficiency and safety throughout the break-in process.
Water Break-In: Step-by-Step (Fast Seating, Extra Cleanup)
For enthusiasts working with sealed 540-size brushed motors, silver cans, and bashing builds, the water break-in method is an effective technique to improve motor performance and longevity. Follow these essential steps carefully to ensure optimal results:
- Prep: Begin by removing the pinion gear and inspecting the brushes through the endbell if accessible.
- Fill a cup with distilled water: Submerge the motor so the commutator and brush area are underwater. Try to keep wires and solder tabs out of the water if possible, although at low voltage it’s not critical.
- Set power parameters: Adjust a bench power supply to 1.5–2.0 V with a current limit of 0.5 A.
This ensures the motor spins slowly with minimal sparking, preventing damage during the break-in.
- Run for 5–10 minutes: Gently swirl the motor in the distilled water to flush out carbon dust buildup. If the water darkens quickly, replace it and continue running for an additional 3–5 minutes. Monitor the can temperature to keep it cool to the touch.
- Rinse and dry: Remove the motor from water, spin briefly in air, then flush the commutator area with contact cleaner followed by compressed air to clear residue.
- Re-lubricate bearings: Apply a tiny drop of light oil to each bearing or bushing to ensure smooth operation and longevity.
- Final seating of brushes: Run the motor dry at 2.0–2.5 V for 2–3 minutes to evaporate any remaining moisture and stabilize the contact patch for optimal brush seating.
Important notes: Avoid this water break-in method on high-end rebuildable motors unless you are prepared for full relubrication afterward.
Never use salt water or any impure liquids, as they can damage motor components. If heavy sparking occurs even while submerged, stop immediately and inspect brush alignment or commutator condition to prevent further damage.
Dry Break-In: Step-by-Step (Clean, Controlled, Slightly Longer)
The dry break-in method is my preferred approach for rebuildable motors and any motor equipped with ball bearings. To ensure optimal performance and longevity, follow this no-load procedure carefully:
- Prep: Remove the pinion gear and make certain the motor is not under any mechanical load.
- Power: Apply a low voltage of about 2.0–3.0 V, setting the current limit between 0.5–0.8 A to protect the motor during initial operation.
- Run intervals: Operate the motor in cycles of 5 minutes on, followed by 2 minutes of cooling. Repeat this for 3–5 cycles, totaling approximately 15–25 minutes.
Throughout, closely monitor the temperature control to keep the motor can below ~60 °C (140 °F), and listen for smoother sound indicators and reduced sparking at the brushes.
- Clean: After completing the last cycle, use a quick blast of contact cleaner and lightly re-oil the bearings to maintain smooth functionality.
- Verify: Utilizing a meter, check the motor’s no-load current. A properly completed dry break-in routine typically results in a 10–20% drop in no-load current compared to a brand-new motor.
If you’re considering using an ESC for break-in, it’s important to use very low throttle settings with no timing, no braking, and a soft start function. While a bench power supply is safer for this process, appropriate ESC settings can replicate the conditions if used correctly.
Always keep the car off the ground and avoid any load to prevent damage.
For detailed guidance, refer to tutorials on how to connect an RC speed controller and how to program an ESC for RC cars. These resources will help you configure your setup correctly to safely perform the dry break-in method using your ESC.
Pro Tips from Real-World Testing
After countless hours testing 540-size motors on a bench dyno and in backyard bashers, a few key insights on voltage effects, brush composition, timing adjustment, ESC tune, and battery health consistently prove true to enhance overall performance improvement:
- Voltage effects: Applying a lower voltage over a longer period (e.g., 2 V for 20 minutes) results in a more even motor seating compared to higher voltage for a shorter time (e.g., 6 V for 2 minutes). This careful approach ensures brush and commutator surfaces mate smoothly.
- Brush composition: The type of brush significantly affects break-in and longevity. Harder brushes take longer to seat properly but offer extended wear, while softer brushes seat quickly but wear out faster, impacting motor lifespan and efficiency.
- Timing adjustment and endbell alignment: Properly setting neutral timing on rebuildable motors reduces sparking and promotes a stable running environment during break-in, preserving brush integrity and motor components.
- Listening to the motor: A steady and even pitch with minimal visible sparking indicates healthy operation, whereas popping noises or bright arcing signal the need to stop and inspect the motor for potential issues.
- ESC tune: Pairing the motor with the correct Electronic Speed Controller settings prevents premature brush wear and optimizes performance. For a comprehensive setup guide, refer to how to set up RC speed controller.
- Battery health: Using healthy battery packs ensures consistent voltage supply for reliable motor performance. Beginners looking to prolong battery life should check out how long do I charge my RC car battery for proper charging routines.
Implementing these best practices leads to noticeable performance improvement, such as smoother off-the-line punch, reduced cogging starts, a slightly higher no-load RPM, and cooler can temperatures after demanding runs.
Common Mistakes to Avoid During Break-In
When breaking in your fresh motor, it’s crucial to avoid common mistakes to ensure peak performance and longevity. One major pitfall is overvoltage; applying over 3 V can cause arcing at the commutator and glaze the brushes, damaging the motor. Additionally, running under load during break-in, such as with the wheels on the ground or a pinion attached, should be strictly avoided to prevent undue stress.
Proper maintenance is equally vital.
Commutator cleaning is necessary to prevent carbon dust buildup in the comm slots—regular flushing with contact cleaner keeps the motor running smoothly. Temperature control is another critical aspect; if the motor can is too hot to touch, stop and allow it to cool down to avoid overheating.
It’s also important to manage your ESC settings carefully during break-in. Disabling all ESC timing and boost ensures a gentle run-in period, preventing premature wear.
Lastly, don’t rush the process—stopping before the brush face fully seats can leave performance gains on the table.
- Too much voltage: Over 3 V can arc the commutator and damage brushes.
- Running under load: Avoid breaking in with wheels on the ground or pinion attached.
- Skipping lubrication: Water break-in requires immediate relubrication; dry methods benefit from a drop of oil.
- Ignoring temperature: Stop and cool if the motor can is too hot to touch.
- Dirty commutator: Prevent carbon dust buildup by cleaning with contact cleaner.
- Using full ESC timing/boost: Disable these during break-in for best results.
- Rushing: Allow the brush face to fully seat for optimal performance.
For tips on improving throttle control post break-in, visit how to control RC car.
Advanced Performance Tips: After the Break-In
To keep your gains and build on them effectively, following a detailed maintenance checklist is essential. This includes regular commutator care—every few packs, clean the comm with contact cleaner and re-oil the bearings to ensure smooth operation. Make it a habit to inspect the brush length and check for an even, dark contact patch to maintain optimal performance.
- Maintenance loop: Clean the commutator and re-oil bearings regularly for longevity.
- Speed tuning: Start with conservative gearing while monitoring temperatures.
Once comfortable, explore advanced techniques on how to make a high-speed RC car at Swell RC.
- Power system strategy: Consistent and strong power delivery is crucial. Consider battery upgrades and improved wiring to maximize performance. Learn more about upgrading your RC car battery here.
- Perspective: If you also operate nitro RC cars and want diverse setup routines, check out how to start a nitro RC car without an igniter at Swell RC.
Integrating these steps into your regular routine not only enhances durability but also optimizes speed and power tuning, ensuring your RC car performs at its peak.
How to Know Your Brushed Motor Is Fully Broken In
When learning how to know if motor is broken in, there are several key indicators to watch for to ensure the process is going smoothly. First, the brush faces should show a uniform, curved contact patch that matches the commutator diameter. Additionally, sparking should be minimal and even, with the sound remaining smooth and consistent throughout operation.
Monitoring the current draw is crucial; you should notice that the no-load current stabilizes and is typically 10–20% lower than when the motor was new. Furthermore, keep an eye on the temperature: the can temperature should remain moderate at the same voltage compared to the first spin.
On the other hand, signs of over-breaking a motor include excessive brush dust, deeper commutator grooving, or a glazed, rainbow-tinted comm surface. These symptoms indicate that you have overshot the breaking-in process and should immediately stop, clean, and reassess before continuing.
| Sign | Normal Indication | Over-Breaking Indication |
|---|---|---|
| Brush Contact Patch | Uniform, curved, matching comm diameter | Irregular wear or uneven contact |
| Sparking | Minimal and even | Excessive sparking |
| Current Draw (No-Load) | Stabilizes, 10–20% lower than new | Fluctuating or higher than normal |
| Temperature | Moderate, stable at same voltage | Elevated, increasing over time |
| Commutator Surface | Clean and uniform | Glazed, rainbow-tinted surface |
Conclusion: The Reward of Doing It Right
My first well-broken-in brushed motor completely changed my lap times and, honestly, my confidence. A careful 15–25 minutes of prep returns hours of cooler temps, smoother performance, smoother launches, and longer motor lifespan. Remember: low voltage, no load, watch the heat, and clean/oil afterward to maximize your acceleration gains.
If you’re ready to keep stacking skills, a great next step is sharpening your driving fundamentals—improving your RC driving skills. For continued learning, check out how to drive a RC car: https://www.swellrc.com/how-to-drive-a-rc-car/. Enjoy that crisp throttle and go have fun dialing in the rest of your setup!
Frequently Asked Questions
- What does it mean to break in a brushed RC motor?
It’s a controlled first run at low voltage and no load to seat the carbon brushes to the commutator’s curve. This increases the contact area, reduces arcing and resistance, and improves efficiency, throttle smoothness, and motor life. - Is the water break-in method better than dry break-in?
Water break-in seats brushes faster and suppresses arcing, but it requires immediate cleaning and relubing and isn’t ideal for high-end rebuildables. Dry break-in is cleaner and safer for bearinged motors, though it usually takes longer. Both work when done at low voltage with temperature control. - How long should you run a brushed RC motor for break-in?
Water method: typically 5–10 minutes (sometimes up to 15 with a water change). Dry method: 15–25 minutes total in cool-down intervals. Stop early if the contact patch is uniform and sparking is minimal; continue a bit longer if seating is incomplete. - Does breaking in your motor make it faster?
It usually improves acceleration, smoothness, and efficiency rather than huge top speed gains. You may see slightly higher RPM and cooler temps, which help the car feel quicker off the line and more consistent over a run. - What mistakes should you avoid when breaking in a brushed motor?
Avoid high voltage (>3 V for 540-size), running under load, skipping post-run lubrication, ignoring temperature, leaving carbon dust in the comm slots, and using ESC timing/boost. These cause arcing, glazing, and premature wear. - Can you break in a brushed motor using your RC car ESC?
Yes, if you set very low throttle, disable timing/boost/brake, and keep the motor unloaded. A current-limited bench power supply is safer and more precise, but a carefully programmed ESC works in a pinch. - How do you know when your brushed motor is fully broken in?
You’ll see an even, curved contact patch on the brushes, minimal sparking, a smoother sound, and a stable, reduced no-load current (often 10–20% lower than new). Temperatures at the same voltage will also be lower than before break-in.