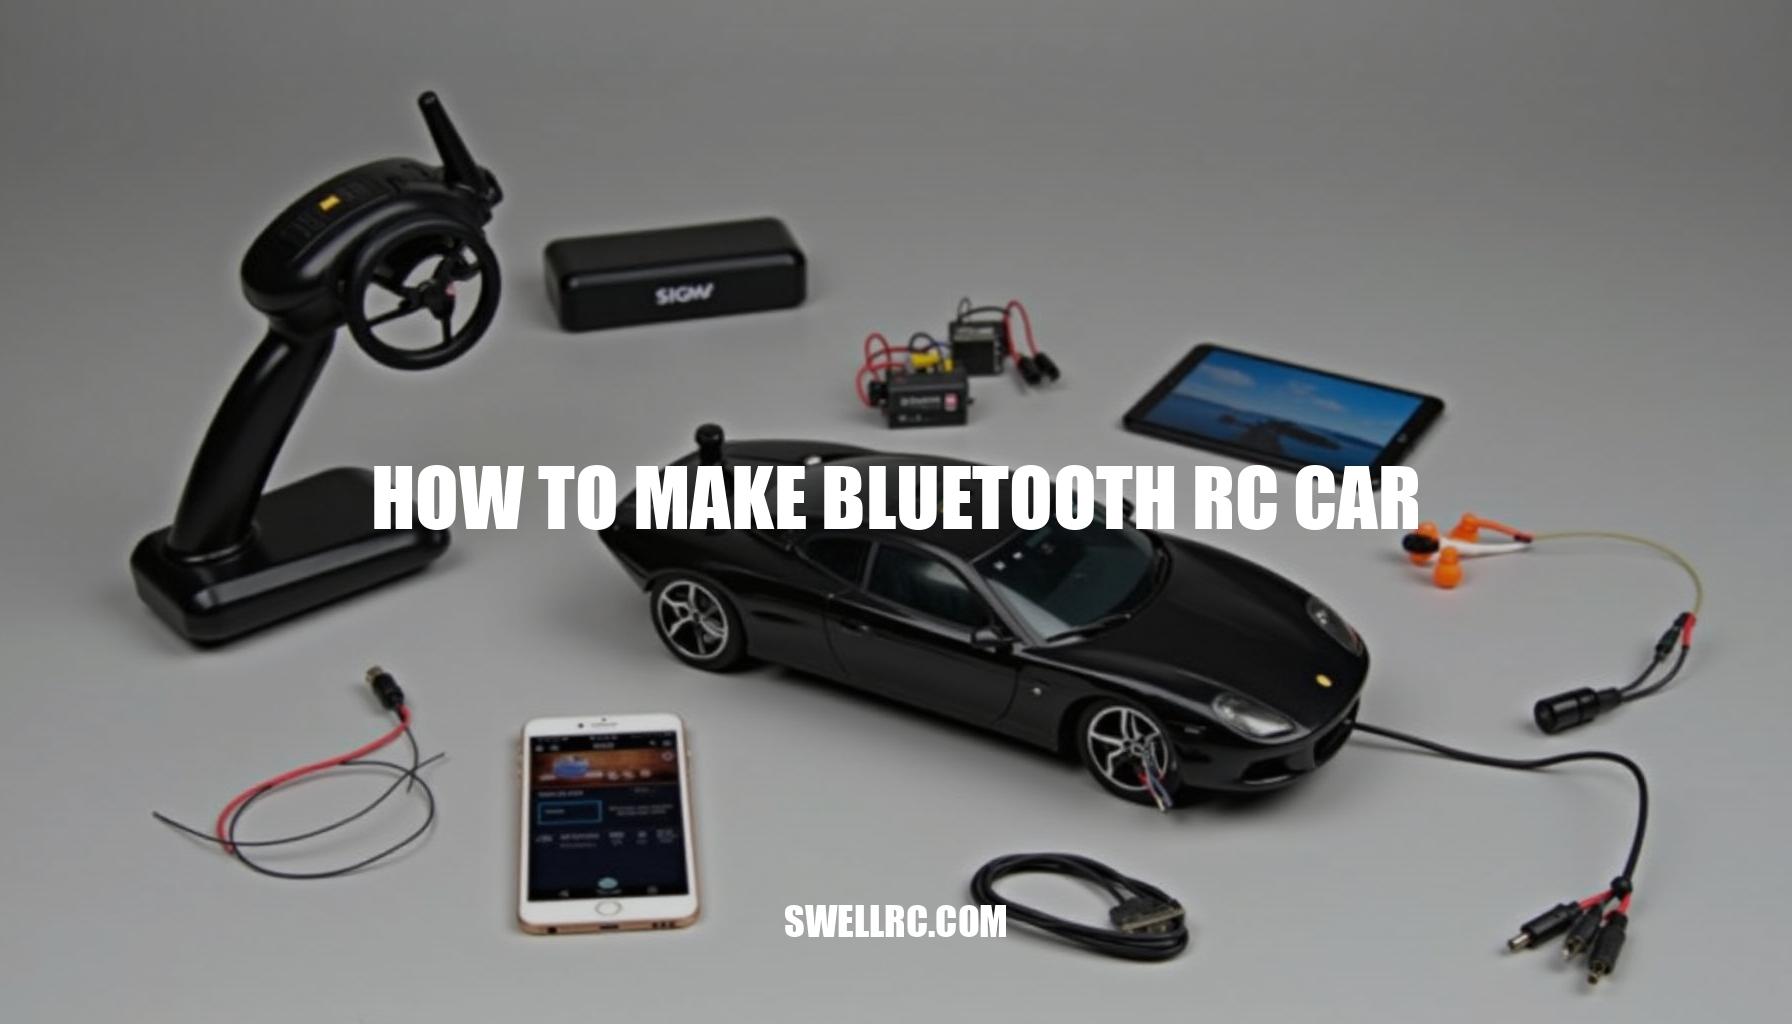
How to Make Bluetooth RC Car: A Step-by-Step Guide
Nothing beats the thrill of merging classic RC tinkering with the magic of modern Bluetooth technology. I still remember the exhilarating moment when, after hours of fiddling with wires and debugging my setup, the motors finally obeyed a simple tap on my smartphone screen. If you’ve ever wondered how to make Bluetooth RC car projects that bring your remote control dreams to life, you’re in the right place!
In this guide, you’ll gather materials, wire the electronics, upload the code, pair your phone, and test your creation — all wrapped in the warm joy of DIY electronics. Fundamentally, the process hinges on your phone sending commands via Bluetooth to the HC-05 module, which communicates with an Arduino. The Arduino then drives the motor driver and servos, making your RC car respond to your smartphone control with precision.
If you’re brand new to Arduino-based RC builds, this primer helps: https://www.swellrc.com/how-to-make-an-rc-car-with-arduino/. So, whether you’re passionate about Bluetooth technology integration, Arduino projects, or crafting your own remote control systems, let’s dive into creating a smart, responsive RC car that’s all yours.
Tools and Materials — The Foundation of Innovation
When building your DIY Bluetooth RC car, it’s essential to gather quality Bluetooth RC car materials that ensure reliability and performance. Below is a comprehensive table highlighting key components, their functions, and important notes to help you during assembly:
| Component | Function | Notes |
|---|---|---|
| Arduino Uno | Microcontroller brain controlling all electronics and logic | Widely supported; perfect for HC-05 module setup and motor control libraries |
| HC-05 Bluetooth module | Wireless serial communication for remote control | Default PIN usually 1234 or 0000; check voltage compatibility with Arduino (3.3V logic) |
| L298N motor driver | Controls two DC motors with direction and speed; acts as an interface with Arduino | Beware of built-in 5V regulator jumper; remove jumper to power motor driver from external 5V source if needed |
| 2x DC gear motors | Drive wheels to provide motion | Choose geared motors for better torque; verify voltage/current ratings match power source and L298N specifications |
| 1x Servo motor | Steers the front wheels for directional control | Metal-geared servos offer enhanced durability and precision |
| Chassis/wheels | Physical frame to mount all components and provide mobility | From acrylic sheets to custom or adapted brick-based chassis (see Lego RC car ideas) for customization |
| LiPo or 6xAA battery pack | Power supply for motors and electronics | Use reputable LiPo brands for safety; ensure voltage/current meets motor and driver requirements; handle with care |
| On/off switch | Enables safe power control to the system | Place in a convenient location for easy access |
| Buck converter (optional) | Provides stable 5V rail for components requiring regulated power | Helps prevent voltage fluctuation issues especially when using LiPo batteries |
| Breadboard or proto board | Platform for assembling circuits without or before soldering | Use for prototyping and testing your HC-05 module setup and motor connections |
| Jumper wires | Connect components electrically | Prefer silicone insulated wires for flexibility and durability |
| Soldering iron and solder | Used to secure wires and components permanently | Essential for reliable connections; practice proper technique |
| Heat-shrink | Insulates and protects soldered connections | Prevents shorts and mechanical stress on wires |
| Double-sided tape / zip ties | Mounting components securely on chassis | Flexible mounting options for neat assembly |
| Multimeter | Measures voltage, current, and continuity for troubleshooting | Indispensable tool in DIY electronics tools kit |
| Smartphone with Android Bluetooth control app | Interface to remotely control the car via Bluetooth | Test your communication protocol with the HC-05 module setup and Arduino |
Remember to select components with voltage and current ratings that suit your chosen motors and power source. Quality DC gear motors provide the necessary torque for smooth driving, while metal-geared servo motors ensure long-term durability in steering. Customizing your chassis can add a unique touch; consider adapting a brick-based or acrylic frame to fit your style and functionality.
Finally, always prioritize safety. Keep safety goggles nearby and work in a well-ventilated area, especially when soldering. With the right Bluetooth RC car materials, proper HC-05 module setup, and essential DIY electronics tools, you’ll be on your way to creating a responsive and reliable Bluetooth-controlled RC car.
Wiring and Circuit Connections — Bringing the Car to Life
Here’s a friendly step-by-step guide to mapping every wire for your Bluetooth RC car project. Follow these clear steps to ensure smooth assembly and operation.
- Power Layout: Connect the battery positive lead directly to the L298N module’s VIN terminal, which powers your motors. If your L298N’s onboard 5V regulator can handle it, power the Arduino through it. Otherwise, use a separate buck converter stepped down to 5V for the Arduino and sensors.
Importantly, always share a common ground (common ground) among the battery, L298N, Arduino, HC-05 module, and servo motor to ensure stable operation and avoid noise.
- Motor Driver to Motors: Attach the left motor wires to the L298N output terminals OUT1 and OUT2, and the right motor to OUT3 and OUT4. This wiring enables directional control based on the signals sent from the Arduino.
- Motor Driver to Arduino: Connect the L298N’s ENA and ENB pins to Arduino PWM pins (e.g., D5 and D6). Then wire IN1 and IN2 to Arduino digital pins (e.g., D8 and D9), and IN3 and IN4 to other digital pins (e.g., D10 and D11). You can remap these pins to your preference, but be sure to update your code accordingly.
This setup lets the Arduino control motor speed and direction using motor control pins.
- Steering Servo: Connect the servo’s signal wire to a Arduino PWM pin such as D3. Power the servo from a regulated 5V line, ensuring its ground is tied to the common ground. Because servos can draw high current, a dedicated 5V regulator is recommended to prevent voltage drops.
- HC-05 Bluetooth Module: Power the HC-05 module by connecting VCC to 5V and GND to the common ground. For communication, wire the HC-05’s TXD to the Arduino’s RX (e.g., D10 if using software serial) and wire the HC-05’s RXD to Arduino TX (e.g., D11) through a simple voltage divider (using resistors around 1k and 2k) to reduce Arduino’s 5V TX signal to approximately 3.3V suitable for the HC-05 input. Remember, the default baud rate is commonly 9600.
This connection is critical for Bluetooth communication and is a key part of your HC-05 to Arduino wiring.
- Power Switch and Mounting: Insert an inline switch on the positive wire from the battery to safely power on and off your system. Secure all modules with tape or zip ties. Keep signal wires short to reduce interference, and twist motor wires together to lessen electrical noise.
- Pre-power Checks: Before powering everything, use a multimeter to verify there are no shorts and that your 5V and VIN rails have the correct voltages. This step helps prevent damage from reversed polarity, missing common ground, or undervoltage—which could cause erratic resets.
Safety Note: Double-check every connection for correct polarity and ensure a shared ground exists across all modules. Missing these can lead to temporary or permanent damage.
This wiring guide, including components like the L298N, HC-05 Bluetooth module, servos, and Arduino, forms the backbone of your wiring diagram for Bluetooth RC car. For advanced tips on PCB and circuit best practices, visit this detailed article. Once you have reliable serial control via Bluetooth, you might explore computer-based RC car control methods, such as USB/Bluetooth bridges covered here.
Coding and Bluetooth Pairing — Teaching Your Car to Listen
Setting up your Arduino IDE for a simple Bluetooth command parser is an excellent way to start with Arduino RC programming. Using the SoftwareSerial library, you can communicate with an HC-05 Bluetooth module at 9600 baud, interpret single-character commands, and control motors and a servo steering mechanism easily.
Here’s the overall structure you’ll implement:
- Initialize SoftwareSerial to communicate with the HC-05 module at 9600 baud.
- Define motor and servo control pins for direction and steering.
- Parse single-character Bluetooth commands like ‘F’ (forward), ‘B’ (backward), ‘L’ (left), ‘R’ (right), and ‘S’ (stop).
- Map commands to motor control signals and servo angles to drive and steer your RC car.
Below is a tiny, well-commented code snippet demonstrating this logic:
#include <SoftwareSerial.h>
#include <Servo.h>

// Instantiate SoftwareSerial RX=10, TX=11
SoftwareSerial bluetooth(10, 11);

// Motor pins
const int motorPinForward = 5;
const int motorPinBackward = 6;

// Servo for steering
Servo steeringServo;
const int servoPin = 9;

void setup() {
  Serial.begin(9600);            // USB serial for debugging
  bluetooth.begin(9600);         // Bluetooth serial at 9600 baud

  pinMode(motorPinForward, OUTPUT);
  pinMode(motorPinBackward, OUTPUT);

  steeringServo.attach(servoPin);
  steeringServo.write(90);       // Center servo
}

void loop() {
  if (bluetooth.available()) {
    char command = bluetooth.read();
    Serial.print("Received: ");
    Serial.println(command);

    switch (command) {
      case 'F': // Forward
        analogWrite(motorPinForward, 255);
        analogWrite(motorPinBackward, 0);
        steeringServo.write(90);
        break;
      case 'B': // Backward
        analogWrite(motorPinForward, 0);
        analogWrite(motorPinBackward, 255);
        steeringServo.write(90);
        break;
      case 'L': // Left
        analogWrite(motorPinForward, 180);
        analogWrite(motorPinBackward, 0);
        steeringServo.write(60);  // Turn left
        break;
      case 'R': // Right
        analogWrite(motorPinForward, 180);
        analogWrite(motorPinBackward, 0);
        steeringServo.write(120); // Turn right
        break;
      case 'S': // Stop
        analogWrite(motorPinForward, 0);
        analogWrite(motorPinBackward, 0);
        steeringServo.write(90);
        break;
      default:
        // Ignore unrecognized commands
        break;
    }
  }

  // Optional: Bridge USB serial to Bluetooth for quick echo test
  if (Serial.available()) {
    char c = Serial.read();
    bluetooth.write(c);
    Serial.write(c); // echo back
  }
}
Explanation line-by-line:
#include <SoftwareSerial.h>and#include <Servo.h>: import libraries for Bluetooth serial and servo control.SoftwareSerial bluetooth(10, 11);: Create a serial port on pins 10 and 11 for HC-05 communication.- Define motor pins and attach the servo to pin 9.
setup(): initializes the USB Serial Monitor and Bluetooth serial at 9600 baud, sets motor pins as output, and centers the steering servo at 90 degrees.loop(): checks if Bluetooth has incoming data, reads a character, prints it on Serial Monitor for debug, then selects motor and servo actions based on the command.- Implements forward, backward, left, right, and stop commands with PWM motor control and servo steering logic.
- Includes an optional USB-to-Bluetooth bridge in
loop()for echo testing commands easily through the Serial Monitor.
To verify your Bluetooth pairing and communication:
- Enable Bluetooth on your phone.
- Pair with your HC-05 module using the PIN
1234or0000. - Open an Android Bluetooth app like a Bluetooth terminal or an RC control application.
- Connect to HC-05 and send test characters like ‘F’, ‘B’, etc., to see the motor responses.
If you prefer traditional transmitter logic and want to dive deeper into remote programming patterns, check out this helpful guide: How to Program a Remote Control to an RC Car.
Clear commenting in your code lets you easily add features like speed modes or headlight toggles in the future, making your project scalable and maintainable.
With these core concepts of Arduino RC programming, HC-05 commands, and PWM motor control combined with servo steering logic, you’ll build a robust, Bluetooth-controlled RC vehicle. Embrace these fundamentals to empower your next wireless Arduino project!
Testing and Troubleshooting — The Moment of Truth
When diving into Bluetooth RC car testing and troubleshooting HC-05 connections, having a practical, upbeat checklist can keep your spirits high and help isolate issues quickly while celebrating those small wins. Here’s a streamlined guide to keep you on track:
- Battery health: Confirm pack voltage under load; if motors stall, fully recharge your battery pack to provide a stable power source.
- Grounds unified: Ensure a single common ground connects your Arduino, HC-05 module, motor driver, and servo to prevent erratic behavior.
- Motor sanity test: Upload a quick sketch that spins motors forward and backward without Bluetooth involvement—this validates your wiring and motor driver functionality.
- Pairing check: Make sure your phone pairs correctly with the HC-05, connects via your control app, and watch for the HC-05 LED to change from fast blinking to a steady or slow blink, confirming the link.
- Serial echo: Using the serial monitor, send characters like ‘F’, ‘B’, ‘L’, ‘R’, and ‘S’ and print received inputs on Arduino. If you see gibberish, investigate baud rate mismatch or TX/RX wiring errors.
- Movement calibration: Tune your PWM values carefully for smooth motor starts, and adjust servo centers precisely with
writeMicrosecondsor servo trim commands for accurate steering. - Noise fixes: Suppress motor noise by adding 0.1 µF capacitors across motor terminals, maintain star-connected grounds for power and logic, and consider a dedicated 5V regulator for your servo to avoid voltage dips.
- Direction swap: If directional control feels inverted—left/right or forward/back—swap motor wiring or invert IN pin logic in your code to realign movement correctly.
A personal note from my troubleshooting journey: initially, my serial communication was a mess due to a baud rate mismatch between Arduino and HC-05.
Once I synchronized these rates and corrected the TX/RX wiring, inputs echoed cleanly in the serial monitor, and control responsiveness soared.
For additional context, control ecosystems such as universal transmitter approaches (Swell RC Universal RC Car Remote Control), phone-based control walkthroughs (Swell RC Phone Control Guide), and syncing traditional remotes (Swell RC Remote Syncing) can provide broader perspectives on Bluetooth and RC car operation.
Now, celebrate that exhilarating moment when your car finally responds crisply to your phone taps—proof that careful attention to Bluetooth RC car testing, PWM tuning, servo calibration, and noise suppression pays off!
Creative Upgrades — Beyond the Basics
Take your RC car upgrades to the next level by dreaming big and experimenting with modular enhancements and cross-project innovations. Here are some inspiring ideas to get your creative juices flowing:
- Vision: Integrate an FPV camera system—choose between an analog VTX or an ESP32-CAM module—to stream live video straight to your smartphone for immersive driving experiences.
- Autonomy: Equip your vehicle with ultrasonic or Time-of-Flight (ToF) sensors for effective obstacle detection, and implement a simple state machine to enable smarter, semi-autonomous navigation.
- Smarter Control: Enhance driving dynamics with speed profiles, soft-start acceleration, and incorporate battery monitoring using a voltage divider circuit. Set up low-voltage alerts specifically designed for LiPo packs to maintain safe power levels.
- Chassis Evolution: Upgrade your build towards a heavy-duty RC monster truck by converting to a 4WD setup, fitting bigger tires, and tuning suspension components.
Explore detailed guides like this resource for inspiration.
- Alternative Radios: Delve into wireless control innovations with ESP32 modules offering BLE or Wi‑Fi connectivity. If you’re feeling inventive, craft your own custom transmitter—start your journey here: RC helicopter remote project, a fantastic thought-starter.
- UI Polish: Develop a custom Android app featuring intuitive sliders and buttons. Enhance usability by color-coding commands and adding haptic feedback for responsive user interaction.
Remember, each upgrade or experiment not only refines your build but also teaches valuable lessons.
Always document your changes meticulously—this helps you roll back effortlessly if a modification complicates your project. By embracing modular RC car upgrades like FPV camera integration, obstacle detection enhancements, advanced speed profiles, ESP32 BLE and Wi‑Fi control, and custom transmitter concepts, you transform your RC car into a dynamic, smart, and thrilling machine ready for endless fun.
Conclusion — My Takeaway from Building a Bluetooth RC Car
Reflecting on my DIY electronics journey, transforming a simple pile of parts into a responsive robot on wheels feels incredibly rewarding. The process began with gathering materials, carefully wiring the L298N motor driver and the HC-05 Bluetooth module to the Arduino, and meticulously programming the microcontroller. Pairing the phone and conducting methodical testing was the final step before watching it come to life.
After all the soldering and coding, seeing it drive was pure magic.
Here’s a quick Arduino RC project recap:
- Assemble components: chassis, L298N, HC-05, motors, Arduino
- Wiring and soldering connections precisely
- Uploading and debugging the control code
- Pairing Bluetooth module with mobile device
- Thorough testing and calibration
This experience is a true source of RC hobby inspiration, and I encourage you to build your own Bluetooth RC car. Share your builds, explore upgrades, and iterate to unlock new capabilities. Believe me, building your own Bluetooth RC car is far more rewarding than you might expect.
It’s not just a project—it’s a gateway to a lifetime of creative RC mods and endless possibilities.
Frequently Asked Questions
- What parts are needed to make a Bluetooth RC car?
You’ll need an Arduino (e.g., Uno), an HC-05 Bluetooth module, an L298N motor driver, two DC gear motors, a steering servo, a chassis with wheels, a suitable battery pack (LiPo or AA), a power switch, wiring (jumper leads, solder), a regulator or buck converter if needed, and a smartphone with a Bluetooth control app. - How does a Bluetooth module control an RC car?
Your phone sends commands over Bluetooth to the HC-05, which passes them as serial data to the Arduino. The Arduino parses those commands and drives the L298N motor driver (for speed/direction via PWM and logic pins) and the servo (for steering). - How do I program an Arduino for a Bluetooth RC car?
Use the Arduino IDE to set up SoftwareSerial for the HC-05, define motor and servo pins, and implement a simple command parser (e.g., ‘F’,’B’,’L’,’R’,’S’). Test by echoing received characters and mapping them to motor directions and servo angles, then refine PWM values for smooth control. - Can I control an RC car with my phone?
Yes. Pair your phone with the HC-05 and use a Bluetooth terminal or RC controller app to send commands. Many apps let you create buttons or joysticks that transmit characters or strings your Arduino code interprets. - How do you test a Bluetooth-controlled RC car?
Verify power and common grounds, run a motor-only test sketch, pair the phone with HC-05, send simple commands, and watch Serial Monitor output for correct characters. Calibrate servo center and tune PWM to eliminate jerky starts. - What are common issues when connecting Bluetooth to RC cars?
Mismatched baud rates, swapped TX/RX lines, no common ground, insufficient power (brownouts), noisy motors causing resets, and incorrect pin mappings. A voltage divider is recommended for the HC-05 RX pin.