How to Make Super Light RC Indoor Planes
I’ll never forget the first time I stumbled upon indoor RC flying—seeing tiny airframes glide gently across a gymnasium at walking speed was absolutely mesmerizing. Discovering how little weight affects flight blew my mind; here were these lightweight RC planes, so small yet so graceful, defying what I thought possible with model aircraft building. Watching micro-planes float effortlessly made me think, “I had to try this myself.” My core goal quickly became clear: achieving extreme lightness for slow, precise indoor flying.
In this journey, I dove into everything from materials and physics to frame building, electronics, balancing, and fine-tuning. If you’re curious how small you can go, here’s a practical primer on a sub-250g RC plane—a great benchmark for beginners wanting to explore the world of indoor flyers. Whether you’re new to indoor RC flying or looking to refine your approach to RC airplane design, this adventure into micro-planes promises to be as thrilling as it is educational.
Understanding the Science of Weight and Lift
Mass is the true enemy of indoor flight because every extra gram demands more lift and higher airspeeds to keep the plane airborne. Wing loading, defined as the weight divided by the wing area, captures this relationship directly. Lower wing loading means the aircraft can fly slower without stalling, which greatly enhances slow-flight performance and enables tight turns with reduced risk of dropping out of the sky.
A simple lift model shows that lift increases with three key factors: airspeed, wing area, and angle of attack. When you reduce mass, you reduce the wing loading, allowing the plane to generate enough lift at lower speeds and gentler angles of attack. This makes indoor RC flying safer and more enjoyable by cutting stall speed and enhancing wing efficiency.
| Parameter | Light Model | Heavier Model |
|---|---|---|
| Weight | 70 g | 110 g |
| Wing Area | 8 dm2 | 8 dm2 |
| Wing Loading | 8.75 g/dm2 | 13.75 g/dm2 |
Comparing these two, the heavier 110 g plane requires a notably higher speed to generate sufficient lift due to its increased wing loading. On the other hand, the 70 g plane can coast at lower speeds and safer stall margins, giving pilots more room for precision maneuvers indoors.
When discussing thrust-to-weight ratio, indoor targets can vary by flying style: 0.6–0.8 is ideal for gentle, scale-like cruising, providing smooth, stable flight without excess acceleration. For playful aerobatics, aiming for roughly a 1:1 thrust-to-weight ratio allows for quick throttle response and snappy maneuvers without sacrificing control.
Choosing the right materials greatly affects weight and strength. Common RC aircraft materials include balsa wood, Depron foam, and EPP foam. Balsa offers excellent strength-to-weight ratios but requires careful handling.
Depron is ultra-light and stiff, perfect for precision cutting and smooth surfaces, while EPP foam provides impressive durability at a small weight increase. When I tested two foams back-to-back, the difference at stall was night and day—making choosing the right sheet matters; here’s a guide to the best foam for RC planes. This reflects the trade-offs between material density and strength-per-gram, which directly affect wing loading and indoor performance.
To sum up, shaving even a few grams can dramatically improve your wing efficiency and slow-flight performance, making indoor RC flying more forgiving, responsive, and fun.
Choosing the Right Lightweight Materials
When building lightweight RC planes, choosing the right materials can make all the difference in performance, durability, and ease of repair. Here’s a practical guide based on weight, stiffness, durability, cost, and hands-on testing:
- Depron (2–3 mm): Ideal for flat-plate wings and profile fuselages, Depron is a favorite among foam model airplanes enthusiasts for its light weight and stiffness. It sands cleanly, allowing for smooth edges and precise shaping.
Pros: Lightweight, stiff, easy to shape. Cons: Can be prone to denting or crushing under heavy impact. Repairs are straightforward with foam-safe CA glue.
See this Depron RC plane overview for more details.
- Select Balsa (6–10 lb/ft³ sheets): Perfect for ribs, sticks, and built-up wings in balsa wood gliders, select balsa offers a classic craftsmanship feel with excellent rigidity. Pros: Strong relative to weight, easy to cut, excellent for indoor lightweight RC planes. Cons: Can splinter on impact, requires careful handling.
Repairs can be done effectively with UHU Por or white glue for resilience. For building tips, check out how to build a balsa wood RC airplane.
- 3D-Printed Parts: Best used selectively for motor mounts and servo trays where precision adds value. Using LW-PLA material helps keep parts light and sturdy.
Pros: Customizable, precise fit. Cons: Adds extra weight if overused, fragile on thin sections. Repairs can be tricky; consider reprinting over glue fixes.
Learn more from how to make a 3D printed RC plane.
- Paper and Cardstock (80–120 gsm): Commonly used for skinning and control surfaces on lightweight RC planes, paper offers a low-cost, easy-to-apply option. Pros: Very lightweight, easy to replace. Cons: Fragile, less durable in moisture.
Repairs involve simple glue applications. For an introduction, visit RC paper aeroplane.
- Cardboard: Suitable for ultra-budget experiments and prototyping cardboard RC planes. Reinforce fold lines with carbon fiber strips or strong tape to improve rigidity.
Pros: Inexpensive, easily available. Cons: Heavier, less durable, quickly weakened by moisture. Repairs are easy but temporary.
See more at cardboard RC plane.
In personal trials comparing these materials, Depron foam planes offered excellent rigidity and quick crash repairs with foam-safe CA glue, outperforming white glue in setting speed. Balsa wood gliders, while classic, required more careful handling during crashes but were very durable with UHU Por adhesive. Foam model airplanes with Depron were lighter and more resilient to small dents, whereas cardboard RC planes showed high durability for cost but struggled with stiffness and moisture resistance.
Paper coverings, though delicate, provided lightweight control surfaces easy to replace after damage.
Quick chooser: If you want simplest and cheapest, start with Depron or thin foam. For classic craftsmanship, try light balsa. For customization, mix printed mounts with foam or balsa for an optimal balance.
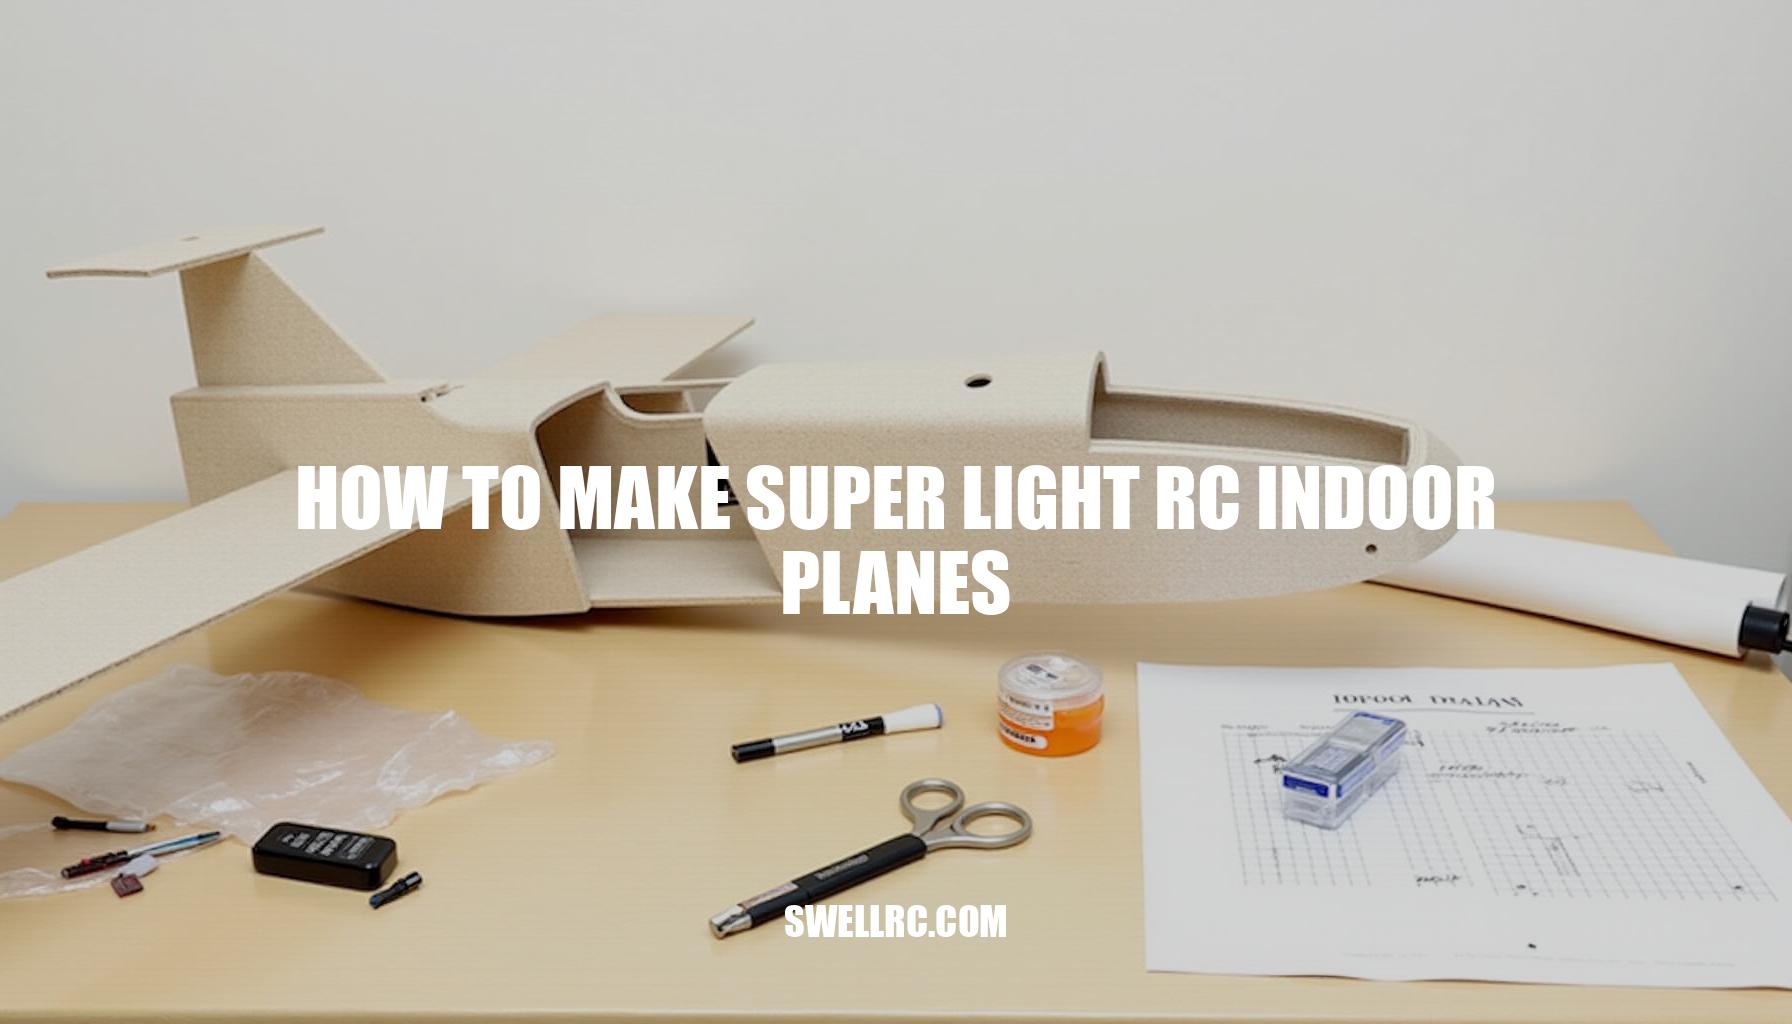
Building the Frame — The Core of Structural Simplicity
Building a lightweight indoor flyer with a wingspan of 450–600 mm and an all-up weight (AUW) target of 45–110 g requires careful attention to RC airplane design principles, materials, and assembly techniques to ensure optimal performance in the confined spaces typical of indoor RC flying. The process can be broken down into the following step-by-step build guide:
- Planform: Opt for a simple rectangular planform or introduce a slight polyhedral wing configuration to enhance stability during flight. Aim for a chord length between 110–140 mm. This straightforward design simplifies construction and handling.
- Wing Construction: Cut the wing from 2–3 mm foam or light balsa sheet, which forms the lightweight airframe. Integrate a 0.8–1.5 mm carbon fiber spar positioned at 30–40% of the chord to provide rigidity without adding significant weight. For added stability, consider an optional tip dihedral—a small upward angle at the wingtips.
- Fuselage: Use a profile plate or a 3×6 mm balsa stick or foam keel as the fuselage backbone. Maintaining a straight and true fuselage is critical for balanced flight dynamics.
- Tail Assembly: Construct an oversized horizontal and vertical tail, each accounting for about 20–25% of the wing area. This provides greater low-speed authority, making the indoor flyer more controllable and responsive at reduced speeds.
- Hinges: Employ thin hinge tape or film for the control surfaces to minimize friction during throw, enabling smooth and reliable actuation.
- Control Horns and Linkages: Fabricate control horns from 0.5–1 mm G10 fiberglass or 3D-printed components for durability and lightweight strength. Use 0.5–0.8 mm carbon fiber pushrods featuring heat-shrink tubing Z-bends, which allow precise control with minimal added weight.
- Mounts: Install a simple motor mount made from laser-cut plywood or 3D-printed parts. Equip a micro electronics bay secured with Velcro to allow easy swapping of battery trays and other modular components, supporting versatility in your foam model airplanes and lightweight airframe design.
- Optional Landing Gear: Decide whether to fit 0.8–1 mm wire landing gear fitted with 20–25 mm foam wheels or to omit landing gear altogether in favor of belly-landing to save precious grams.
Emphasizing glue discipline is paramount: apply only tiny beads of glue at joints. Excess glue rapidly inflates the weight beyond target, compromising flight performance. For construction tips using foam, refer to the detailed techniques at SwellRC Foam Model Airplane Resource.
For design inspiration, modular concepts, and trimming practice, the RC Balsa Glider Kits provide excellent examples of lightweight and functional indoor flyers.
To assist in material selection and weight optimization during construction, consider the following comparative table of typical material weights per sheet:
| Material | Thickness | Weight per Sheet (approx.) |
|---|---|---|
| Foam Board | 3 mm | 40–50 g |
| Balsa Wood | 2–3 mm | 15–25 g |
| Carbon Fiber Spar | 1 mm diameter | 2–4 g per 100 mm length |
Typical finished surface area versus spar sizes usually aligns with the spar being approximately as long as the wingspan and placed near the leading edge at 30–40% chord, balancing structural strength with lightness. Opting for modular components like detachable wings and swappable battery trays not only facilitates transport and repairs but also allows rapid configuration changes tailored for different indoor flying environments.
In summary, this systematic approach leverages RC airplane design fundamentals, including employing carbon fiber spars and materials common to foam model airplanes and RC balsa glider kits, culminating in a stable, lightweight indoor flyer ideal for lightweight airframe construction and enjoyable indoor RC flying.
Lightweight Power Systems and Electronics
When building lightweight micro RC planes, selecting parts that keep grams down without sacrificing control is key to achieving excellent thrust-to-weight ratio and overall performance. Here’s a guide to optimal components:
- Motors: For 20–40 g builds using brushed motors, choose compact 6×15–8×20 mm sizes. For slightly heavier 45–120 g builds, go with brushless 1102–1104 motors in the 7000–10000 Kv range paired with 3–5 inch slow-fly props.
These choices balance thrust needs and weight efficiently.
- ESC (Electronic Speed Controller): Use 5–10 A ESCs for brushless setups. Opt for BLHeli-S class ESCs to ensure reliable startup and smooth control, crucial for precise indoor RC flying.
- Servos: Lightweight servos between 1.7–2.5 g suffice for standard aileron, elevator, and rudder control surfaces. If you require additional torque, servos in the 3.7–4.3 g range are appropriate without adding excessive weight.
- Receiver: A 2–4 g full-range micro receiver or integrated Rx/ESC boards work well for brushed builds, minimizing complexity and mass.
- Battery: For brushed or ultra-light brushless setups, a 1S 300–550 mAh LiPo battery balances capacity and weight.
For more spirited performance, 2S 300–450 mAh packs offer increased power while keeping within a 20–35C C-rating range suitable for lightweight aircraft.
Field-tested tips to optimize your build include aiming for the electronics to weigh roughly 35–50% of the all-up weight (AUW), keeping thrust lines neutral to prevent torque-induced instabilities, and routing wires as short as possible to save weight and reduce resistance.
| Component | Weight Range (g) | Estimated Thrust Range (g) |
|---|---|---|
| Brushed Motor | 3–8 | 50–100 |
| Brushless Motor | 6–16 | 150–350 |
| ESC | 1–5 | N/A |
| Servo | 1.7–4.3 | N/A |
| Receiver | 2–4 | N/A |
| Battery (LiPo) | 8–28 | N/A |
| Propeller | 0.5–1.2 | N/A |
Choosing the right RC electronics—motors, ESC, servos, receivers, and LiPo batteries—is critical for balanced performance in micro RC plane kits. Whether you’re aiming for easy indoor RC flying or brisk outdoor flights, managing component weight while maintaining control responsiveness ensures a fun, efficient build. These micro RC plane kits make picking components painless and are an excellent curated starting point for enthusiasts looking to optimize their lightweight models.
Assembly, Balancing, and Flight Testing
Final assembly of your RC airplane is crucial for stable flight and reliable control. Start by carefully squaring the tail to the wing to ensure proper alignment. Set the motor thrust line with a slight 0–2° down thrust to prevent the nose from pitching up and a subtle 0–1° right thrust to counter torque effects.
When connecting pushrods, align them to avoid binding, which can cause erratic responses.
Proper center of gravity (CG) placement is a key factor in flight stability and control behavior. Begin by positioning the CG at approximately 25–33% of the wing chord. A forward CG location increases stability but can reduce agility, making the plane easier to control but less responsive.
Conversely, a rearward CG enhances maneuverability but can make the aircraft prone to stalls and more difficult to recover. I learned this the hard way after weeks of frustrating nose dives; sometimes a mere 1–2 mm shift in battery position can drastically transform a flight’s behavior.
Set initial control throws to moderate values to balance responsiveness and manageability: elevator at ±12–18°, rudder at ±20–25°, and ailerons at ±10–14°. Applying 30–40% exponential (expo) will help tame twitchiness by softening control input near neutral sticks.
Before your maiden flight, perform this comprehensive preflight checklist:
- Airframe straight, no warps
- Linkages slop-free
- Control surfaces neutral at trim
- Battery securely fastened
- Range check completed
- Plan for low-rate maiden flight settings
Indoor RC flying and flight testing benefit greatly from methodical trimming practices.
Indoor conditions offer the opportunity to fine-tune control throws and CG without wind interference. Start trimming by gently hand-launching your aircraft into ground effect, then gradually increase throttle while observing response. Use sub-trim adjustments and fine-tune the CG by sliding the battery forward or aft to optimize stability and control.
Micro glider and trainer kits serve as excellent teaching platforms for mastering these RC trimming fundamentals.
Troubleshooting, Maintenance, and Creative Modifications
When troubleshooting RC planes, especially during indoor RC maintenance or DIY RC plane projects, quick and effective fixes can save your model from a premature retirement. For a tail-heavy wobble, try moving the battery forward and reduce the elevator throw to regain stability. If you experience pitch oscillation, adding 1–2° of down-thrust and checking the CG will often resolve the issue.
To counter roll coupling or Dutch roll, add 2–3° of dihedral or slightly increase the fin area for better control. Weak climb performance can be improved by upsizing the propeller by 0.5 inch or choosing one with a higher pitch, making sure the battery is fresh to maintain power. Motor vibration is typically fixed by balancing the propeller, truing the shaft, and firming up the motor mount to prevent unwanted shaking.
If your plane is overweight, consider re-gluing with smaller glue beads, lightening pushrods, and shortening leads to reduce unnecessary mass. Repair techniques that suit foam surfaces include using foam-safe CA glue plus a kicker for quick joins, UHU Por contact technique for flexible foam joints, lightweight tape for hinges and temporary field fixes, and 0.5–1 mm carbon fiber strips as splints or reinforced struts to strengthen damaged areas. Encourage creativity in your builds by incorporating LED strips for orientation, using paint pens or an airbrush with minimal coats for customization, and experimenting with hybrid builds such as a Depron wing combined with a balsa tail or printed motor mounts.
Finally, to keep your budget low, salvage electronics from older micro builds—it’s a smart approach in DIY RC plane construction.
Conclusion — The Joy of Creating Airborne Minimalism
It’s truly fascinating how just a few grams can make all the difference between a model that tiptoes gracefully through a gym and one that bounces unpredictably off the walls. In my experience with lightweight RC planes, the core lessons became crystal clear: pick light, stiff materials; build a simple, straight airframe; choose efficient micro electronics; and obsess over center of gravity (CG) and trimming. Every gram I saved showed up in calmer turns and slower landings—I’m hooked!
For those diving into the world of indoor RC flying, consider exploring varied options like:
- Micro RC plane kits that come pre-designed for optimal performance
- Innovative combinations such as foam‑balsa hybrids and 3D printed mounts
- Classic materials like Depron foam planes and balsa wood gliders that are staples in model aircraft building
Each tweak you make—whether trying new spans, testing different airfoils, or experimenting with materials—brings you closer to that perfect, smooth flight experience.
Don’t hesitate to jump in and build your first lightweight RC plane this week. The joy of seeing your model soar effortlessly in tight indoor spaces is an unbeatable reward. So grab your tools and let’s keep pushing the limits of indoor RC flying together!
Frequently Asked Questions
- What materials are best for building a super light RC indoor plane?
Depron or similar light foam (2–3 mm) and select light balsa (6–10 lb/ft³) are the top choices thanks to their strength‑to‑weight and easy repair. Carbon fiber rods or strips make excellent spars. Paper/cardstock and small 3D‑printed parts can supplement without adding much mass. - How do you make an RC plane light but durable?
Use the lightest suitable sheet (foam or balsa), reinforce only where loads concentrate (spar, motor mount), and practice glue discipline—tiny fillets instead of blobs. Add carbon locally, keep wiring short, and design for easy repairs (tape hinges, modular electronics bay). - How much does a typical indoor RC plane weigh?
Beginners often target 45–110 grams all‑up weight for a 450–600 mm span. Micro featherweight builds can fly at 20–40 g; larger indoor aerobats may reach 120–180 g if wing area is sufficient. - Can you build an RC plane under 250 grams?
Yes. In fact, sub‑250 g is common. With 2–3 mm foam or light balsa, micro servos, and a 1S–2S setup, it’s straightforward to finish well below 250 g, ideal for indoor and small outdoor spaces. - What motor and battery setup works best for an ultra‑light indoor aircraft?
For 45–110 g models, a brushless 1102–1104 motor on a 3–5 inch slow‑fly prop driven by a 1S–2S 300–450 mAh LiPo is versatile. For sub‑40 g builds, a brushed 6×15–8×20 mm motor with a 1S 300–500 mAh LiPo is efficient and light. - How do you keep stability with such a lightweight airframe?
Set the CG at about 25–33% of wing chord, add slight dihedral or larger tail surfaces for inherent stability, and use moderate control throws with expo. Ensure the airframe is straight and the motor thrust line is close to neutral. - What’s the easiest type of RC plane to start building at home?
A flat‑plate wing trainer made from 2–3 mm Depron or light foam with a simple stick fuselage is the fastest, cheapest path. It uses minimal parts, flies slowly, and survives bumps with easy repairs.