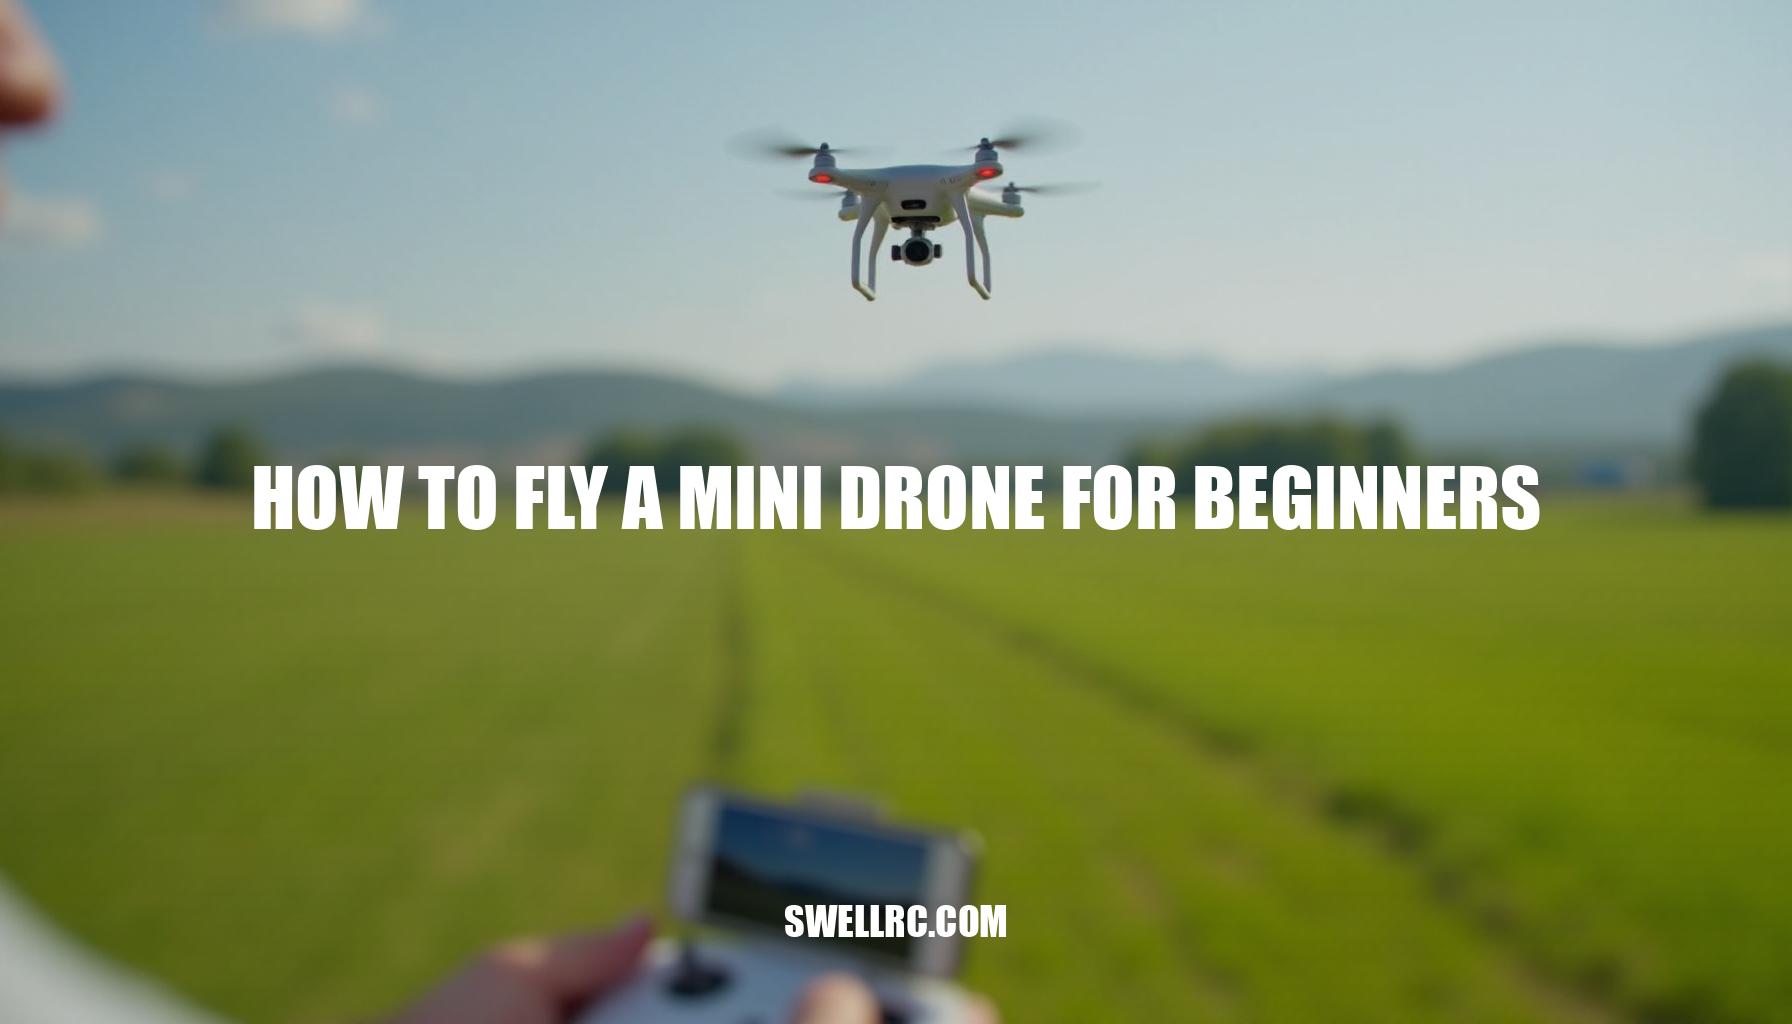
How to Fly a Mini Drone for Beginners: A Step-by-Step Guide
That unforgettable moment when your mini drone gently lifts off—the soft whirl of the propellers slicing through the air, the room suddenly hushed in anticipation—followed by the exhilarating click as it hovers steadily for the first time. If you’ve ever felt that rush, you know the unique thrill of beginner drone flying. Mini drones, those small and lightweight quadcopters often equipped with handy features like prop guards and altitude hold, are perfect companions for mastering the basics of drone flight.
Unlike RC helicopters, which can be intimidating for novices, or heavier camera platforms demanding more power and care, mini drones strike an ideal balance: forgiving yet sophisticated enough to challenge your finesse and patience. As you embark on this journey, you’ll soon grasp essential drone flight basics including Mode 2 controller layout, throttle discipline, yaw, pitch, and roll adjustments, visual orientation, and fundamental calibration techniques. This comprehensive guide will walk you through everything—from unboxing your RC drone to achieving stable hovering, learning safe indoor and outdoor flight routines, quick troubleshooting tips, and advancing your skills with trusted resources.
Get ready to soar confidently into the adventures of mini drone piloting!
Understanding Your Mini Drone – Components and Controls Explained
Understanding the essential parts of a mini drone can make your flying experience smoother and less intimidating. Here’s a friendly guide with key components and their roles:
- Frame and arms: These form the sturdy skeleton protecting the drone’s inner components while setting the proper spacing for the motors, ensuring stable flight.
- Propellers (CW/CCW): The clockwise (CW) and counterclockwise (CCW) propellers generate lift. Correct pairing is crucial for propeller safety and balanced, stable flight.
- Motors and gears: They spin the propellers. Listen carefully for any irregular sounds which might indicate damage or debris affecting performance.
- Battery and charger: Your drone’s flight time depends on battery voltage and capacity. Always follow safe charging habits to protect battery life and ensure reliable power.
- Controller/transmitter: Typically set to Mode 2, the stick layout manages your drone’s movements. You’ll find throttle control, yaw, pitch, and roll sticks along with adjustment rates and trims for fine-tuning.
- Sensors: The gyroscope and accelerometer detect orientation and movement, aiding stability. Some drones include a barometer for altitude-hold features.
- Optional camera/FPV: If your drone has a camera, angle adjustments improve view while features like “jello reduction” enhance video stability. Keep weight in mind, as heavier cameras affect flight dynamics.
Now, a quick overview of the Mode 2 flight controls to make your first flights intuitive:
- Throttle (left stick up/down): Controls altitude — push up to rise, down to descend.
- Yaw (left stick left/right): Rotates the drone’s nose left or right without changing its position.
- Pitch (right stick up/down): Moves the drone forward or backward.
- Roll (right stick left/right): Moves the drone left or right laterally.
Regular drone calibration keeps flight smooth. Always calibrate the gyro sensor on a level surface, especially after hard landings or moving to a new location. Use flight trimming adjustments to counter any slow drifting in hover; if trims become excessive, reset them to avoid control issues.
For step-by-step, model-specific setup like “Avialogic mini drone instructions,” visit Avialogic configurations to guide your process seamlessly.
- Calibrating on an uneven surface causing inaccurate sensor data.
- Mixing up CW/CCW propellers leading to unstable flights.
- Binding your controller near strong Wi-Fi interference which can cause connection issues.
- Skipping prop guards during early indoor flying increases damage risk.
- Flying on a weak or unbalanced battery reduces power and can harm components.
With these basics understood, your mini drone becomes less mysterious and more a fun tool to master. Remember, sensors like the gyroscope, along with proper throttle, yaw, pitch, roll control, and trimming, are your friends for safe and enjoyable flying!
Pre-Flight Checklist – Setting Up for Success
Preparing your mini drone for its first flight is crucial to ensure a smooth experience, minimize crashes, and avoid malfunctions. Following a standardized pre-flight checklist can save you from common pitfalls. Here’s a practical, step-by-step guide to get your drone airborne safely and efficiently:
- Inspect frame and props: Verify the integrity of the frame, and confirm that the clockwise (CW) and counter-clockwise (CCW) propeller alignment is correct and that all props are snugly attached.
- Battery check: Fully charge the battery, seat it securely in place, and check for any signs of puffing or excessive heat to prevent mid-flight failures.
- Power on order: Always turn on the transmitter first, then the drone—unless your manual specifies otherwise—to ensure proper connection.
- Binding and controls: Pair or bind the transmitter to the drone, confirm full stick range, and set beginner or low-rate mode for controlled, smooth responses.
- Calibration: Perform gyro calibration on a level surface to center the trim settings and enhance flight stability.
- Indoor flight considerations: If flying indoors, check that prop guards are installed and confirm the area is free of obstacles to prevent collisions.
- Camera setup (optional): For drones equipped with a camera, confirm the presence of an SD card, adjust the camera angle, and ensure it is tightly mounted.
- Control test: Conduct a quick test at low throttle to confirm stable lift and responsive stick inputs, avoiding abrupt movements.
- Open-space selection: Choose a calm environment with no (or minimal) wind, and keep away from people and pets to maintain safety.
Real-world insight: Spending just 60 seconds on this thorough prep prevents at least 10 minutes of frustrating troubleshooting later—simple issues like a slightly loose propeller or taking off on an uneven surface can cause your drone to drift unexpectedly.
For additional context, consider looking into higher-end calibration standards such as detailed by DJI drone enthusiasts (how to fly a DJI drone).
- Place the drone on a perfectly level table.
- Gently wipe lenses and propellers with a microfiber cloth.
- Verify trim settings are centered.
- Perform a hover check at knee height before full flight.
- Only proceed if the drone responds intuitively and smoothly.
Safety nudge: Always follow local regulations for drone flight, keep your fingers clear of spinning props, and stand behind the drone’s tail at takeoff to simplify orientation and enhance safety.
Taking Off and Hovering – The Foundation of All Drone Skills
Mastering drone takeoff and landing with safe lift-off, stabilizing, and hovering techniques is essential for building confidence and essential muscle memory before advancing to complex maneuvers. Begin your journey by following a clear step-by-step takeoff process:
- Place your drone on a level surface with the nose pointing away from you to maintain orientation.
- Gently raise the throttle control until the drone feels light, then apply a touch more power to lift it about 10–20 inches off the ground.
- Hold the altitude steady using tiny throttle nudges, avoiding large stick movements that can destabilize the aircraft.
Once airborne, it’s crucial to maintain hover and orientation to reinforce your skills:
- Keep the drone’s nose pointing away from you to simplify interpreting left/right (roll) and forward/back (pitch) controls.
- Make small corrective inputs and return your sticks to center frequently to develop fine motor control.
- If your drone features an altitude hold, enable it during initial practice sessions to stabilize your hover.
Should your drone drift to one side, troubleshoot with the following hints to correct trim and orientation:
- Recalibrate your gyros on a perfectly flat surface to ensure accurate sensor data.
- Verify that propellers are rotating in the correct direction and inspect motor health for any issues.
- Use trims sparingly to counteract slow drift, but be careful to re-center them regularly to avoid overcorrection.
- Check indoor flying areas for air drafts from fans or air conditioning that can affect stability.
Developing control over hover takes practice, but when it clicks, everything slows down—you’ll feel your control tighten and your confidence lift with it. For detailed guidance tailored to your model, explore this beginner’s tutorial on how to fly a UDI RC drone. With consistent practice of these foundational skills, you’ll be ready to master advanced flying techniques in no time.
Practicing Indoors and Outdoors – Building Skill Incrementally
When moving from how to keep a drone stable indoors to mastering outdoor flights, it’s vital to recognize the key environment differences and follow a structured progression through practice drills. Indoors, the air tends to be calm and space is tight, making it ideal for honing hover skills, orientation, and precision. Outdoors, you gain more room to maneuver but face challenges like wind management and sun glare, which enhance your throttle finesse and situational awareness.
Begin each session with short, focused flights lasting 5–8 minutes per battery to maximize learning and avoid fatigue.
A sensible progression of practice drills includes:
- Stationary hover at eye level, advancing to a nose-in hover to build confidence and control.
- Slow box patterns, then smoothly flown figure-eights to improve spatial awareness and coordinated movement.
- Precision landings onto a coaster or taped square to sharpen your landing precision under varying conditions.
- Controlled turns where you link gentle yaw with coordinated pitch and roll, fostering smooth, intentional movements.
Reflecting on my first breeze outside, I vividly remember how subtle micro-adjustments on the throttle transformed a static hover into a dynamic, alive flight—highlighting the importance of mastering these nuances early on. For certain models like the UFO quadcopter drone, detailed instructions (UFO quadcopter drone instructions) provide excellent additional guidance.
Consistency is key: aim for 3–5 short practice sessions per week rather than one marathon flight. Regularly review your flight footage or notes to track progress and identify areas needing improvement.
Finally, avoid flying during peak wind times; early mornings or evenings often provide smoother conditions, enhancing your wind management strategies and overall flight experience.
Troubleshooting Common Beginner Issues
Flying a mini drone can be incredibly rewarding, but beginners often face common setbacks that lead to frustration. This concise mini drone troubleshooting guide helps map frequent issues to their likely causes and quick fixes, keeping your flights smooth and enjoyable. For example, if your drone won’t lift off, it could stem from battery issues like low charge, incorrect propeller orientation, or motor jams.
Similarly, experiencing unstable hover or drifting might point to calibration problems or external factors like wind. A sudden loss of signal often relates to interference or transmitter battery problems. Refer to the table below for a clear snapshot of these issues, causes, and solutions:
| Issue | Possible Cause | Solution |
|---|---|---|
| Won’t lift off | Low battery; wrong prop orientation; motor/gear jam; throttle limit | Fully charge; match CW/CCW props; remove hair/debris; disable throttle limit; recalibrate |
| Unstable hover/drift | No calibration; uneven surface; wind; over-trimmed | Calibrate level; test indoors; reset trims; check props for bends |
| Loss of signal | Interference; low TX batteries; out of range | Fly closer; replace TX batteries; rebind; avoid Wi‑Fi congestion |
| Flips on takeoff | Misplaced props or reversed motors | Re-check prop labels and motor direction; swap as needed |
| Short flight time | Old or cold battery; aggressive flying | Use fresh, warm batteries; reduce throttle punches; consider higher-capacity packs if supported |
| Wobble/jello in video | Loose mount; bent props; high vibrations | Tighten mounts; replace props; balance if possible |
Embarking on flying a UFO drone? Check out a great how to fly a UFO drone guide to complement this troubleshooting overview. From personal experience, adopting a methodical checklist—starting with verifying propeller orientation, completing a thorough calibration, then ensuring batteries are fully charged—transformed repeated tip-overs into solid, centered takeoffs within just a weekend.
With the right approach, mini drone troubleshooting becomes straightforward, turning flying challenges into exhilarating airborne success.
Leveling Up – Exploring Advanced Mini Drone Skills
As you gain confidence with FPV basics, it’s time to embrace advanced maneuvers and tuning techniques that elevate your flying experience. Start by practicing smoother transitions between hover and forward flight to build fluidity. Then, try coordinated turns, which mix yaw with gentle roll and pitch for graceful, controlled movement.
If your model supports it, practicing flips and rolls can add excitement—but always perform these high enough and over soft ground to stay safe.
Improving camera stabilization is equally important. Reduce jello effects by using firmer mounts and fresh props, which enhances your video quality. Don’t hesitate to experiment with your camera angle to find the sweet spot between forward speed and stable framing, tailoring your setup to your flying style.
If you’re looking for a creative challenge, consider light customization by building or modifying a tiny FPV rig.
For guidance, check out how to make a mini drone with camera—a perfect introduction to drone making and personalization.
Finally, foster your growth by engaging with the FPV community. Log your flights, record short clips, and share your progress for feedback. Joining forums or local clubs nurtures a safe flying culture and accelerates learning.
Set achievable micro-goals each week, such as holding a 30-second nose-in hover, to build consistency and confidence. By focusing on these practical next steps—advanced maneuvers, flips, camera stabilization, tuning, rates and expo adjustments—you’ll continue progressing along your FPV journey with enthusiasm and skill.
Related Hobbies and Cross-Training in RC Flight
Enhancing your RC helicopter skills by exploring broader RC aviation platforms offers a rewarding path to deeper learning and increased fun. Engaging in cross-training activities, such as mastering the RC helicopter basics that focus on throttle precision and orientation awareness, is foundational. Additionally, trying out flying model airplanes for beginners teaches smooth stick inputs and effective line management, skills that directly complement helicopter piloting.
For a budget-friendly start, options like a remote control helicopter Walmart purchase provide casual practice environments that enhance hand-eye coordination and altitude management.
- RC helicopter basics: throttle precision and orientation awareness to maintain control.
- Flying model airplanes for beginners: smooth stick inputs and line management for stable flight.
- Budget-friendly entry points: remote control helicopters available at Walmart offer accessible practice opportunities.
These pursuits emphasize transferable skills such as gentle stick economy and situational awareness, which are crucial across all RC platforms. Experimenting with multiple RC devices cultivates adaptability and confidence, as each platform teaches nuances that reinforce one another, making you a more proficient pilot overall.
Conclusion – Your First Flight, and Where It Takes You Next
Reflecting on your beginner drone flying journey, you’ve transitioned from the initial unboxing nerves to achieving your first stable hover, and now confidently executing smooth figure-eights. This progression highlights how practice fuels confidence and skill development.
To continue advancing, remember to engage in safe flying by conducting short practice sessions in controlled environments. Maintaining steady calibration habits ensures your mini drone performs optimally, reducing risks and enhancing your flying experience.
Personally, I find ongoing joy in learning new flight lines and landing more precisely with each session.
This continuous learning keeps the thrill of flying alive and motivates me to improve steadily.
Keep in mind: anyone can master mini drones with patience, curiosity, and a simple, consistent routine. Here are a few tips to support your progression:
- Keep detailed notes on your flights to track improvements and identify areas needing attention.
- Celebrate small wins, like longer stable hovers or smoother turns, to build motivation.
- Plan your next practice session thoughtfully, focusing on safe flying principles.
With these steps, you’ll find that each day brings increased competence and enjoyment. So, keep your spirits high, your batteries charged, and fly again tomorrow!
Frequently Asked Questions
- How do you control a mini drone for the first time?
Power on transmitter, then drone; bind and calibrate gyros on a level surface. In Mode 2: left stick = throttle/yaw, right stick = pitch/roll. Gently raise throttle to lift a few inches, keep the nose pointed away from you, and make tiny corrections. Use trims to counter slow drift. Keep sessions short in a clear indoor space. - What are the common mistakes beginners make when flying drones?
Skipping calibration, flying with low or unbalanced batteries, launching in wind, overcorrecting sticks, losing orientation, ignoring prop guards indoors, flying near people/obstacles, and not reading the manual or doing pre-flight checks. - Do I need to calibrate my drone before every flight?
Not always, but it’s smart after hard landings, moving to a new location, battery changes, firmware updates, or when you notice drift. For mini drones without GPS, a quick level-surface gyro calibration takes seconds and greatly improves stability. - How can I practice flying a drone indoors safely?
Use a large, uncluttered room; install prop guards; set beginner/low rates; keep below head height; avoid fans/AC drafts; keep people and pets clear. Practice gentle throttle, hover, square patterns, and spot landings. Keep spare props handy. - What are some tips to make a mini drone flight smoother?
Calibrate on level ground, check prop orientation and tightness, use fresh balanced batteries, enable altitude hold if available, lower rates/add expo to soften inputs, make small stick movements, trim out drift, practice slow figure-eights, and avoid wind. - How do I fix a mini drone that won’t lift off?
Charge the battery fully, confirm props match motor directions (CW/CCW), remove hair/debris from motors/gears, recalibrate, rebind if needed, and disable throttle limits. Replace bent props or weak batteries if lift is still insufficient.