How to Hang RC Planes Safely and Stylishly
After realizing my hangar shelf was overflowing with my beloved models, I finally learned how to hang RC planes without stressing the delicate wings—or turning my workshop into chaos. If you’ve ever dealt with warped wings, dented EPO foam, or finicky control surfaces, you know why proper RC plane hanging matters. Poor support can even strain landing gear, making repairs a regular headache.
Stick with me, and I’ll share tested, safe, and stylish ways to suspend your remote control aircraft—from ceiling hooks to wall mounts—and sprinkle in some clever RC plane storage ideas to elevate your RC workshop setup. Think of this as a friendly chat where hands-on experience meets practical safety tips, helping you turn your models into a striking remote control aircraft display you can be proud of.
Why Proper Hanging Matters for RC Planes
When it comes to preservation and performance of RC planes, understanding how weight distribution interacts with your model’s structure is critical. Weight should always rest on strong points such as the fuselage, wing root, or landing gear rather than on mid-wing foam panels or thin balsa skins. Concentrating pressure on softer materials causes dents, hanger rash, warped control surfaces like ailerons and elevators, and misaligned thrust lines over time — all of which degrade flight quality and durability.
Different materials respond uniquely to these stresses. EPO foam, known for its resilience, resists impact but is prone to surface marks and dents when point-loaded. On the other hand, balsa wood is lightweight but fragile, making improper hanging especially detrimental.
Composite materials can resist minor dents but risk cracking if stressed at a single point. Ultra-light paper builds deform with ease under pressure and require delicate handling. Environmental factors add complexity: heat softens foam’s memory, allowing dents to set, while humidity causes balsa to swell and warp, challenging model airplane display solutions.
Choosing the right hanging system can mitigate risk and maintain pristine condition. After experimenting with RC plane hanging methods like wall mounts, ceiling hooks, and rack systems, I could instantly see which setup preserved trim and balance best. Here’s a concise comparison to guide your remote control aircraft display decisions:
| Hanging System | Space Efficiency | Dust Exposure Risk | Ease of Access | Pros | Cons |
|---|---|---|---|---|---|
| Wall Mount | Moderate | Low | High | Good visibility, secure attachment on strong points | Limited by wall space, may expose underside to dust |
| Ceiling Hook | High | Moderate | Moderate | Maximizes space, no floor clutter | Harder to reach, risk of swinging causing damage |
| Rack System | Low to Moderate | Low | High | Stable support focused on strong points, easy access | Occupies floor space, limited capacity |
For enthusiasts working specifically with EPO material, understanding its unique needs is essential. See EPO RC plane care guides to learn how to optimize EPO material protection and extend your model’s life.
In conclusion, choosing and implementing hanging systems for balsa models, foam crafts, or composite builds requires attentiveness to how weight and pressure affect each material differently. Prioritizing strong points for weight support and selecting appropriate display methods ensures your remote control aircraft display stays both attractive and airworthy for years to come.
Tools and Materials You’ll Need
When hanging your RC planes safely and securely, using the right tools to hang RC planes is essential to protect your valuable models. Here’s a thorough checklist with explanations:
- Ceiling/wall hooks rated above aircraft weight: Ensures the hooks can safely bear your model’s load with a significant safety margin, preventing accidents.
- Lag eye bolts: Heavy-duty fasteners that anchor securely into studs for robust suspension points.
- Stud finder: Identifies structural framing behind drywall to install anchors safely, avoiding weak spots.
- Drywall anchors (toggle or sleeve): Provides strong mounting points in drywall when studs are not available, crucial for secure wall mounts for RC planes.
- Soft nylon rope or paracord: Durable yet gentle on your plane’s finish, ideal for suspending models without damage.
- UV-resistant clear line: Minimizes visible suspension lines and withstands sun exposure for longevity.
- Wide nylon webbing slings: Distributes the aircraft’s weight more evenly, reducing stress on delicate balsa structures; in my experience, wide webbing slings distributed weight far better than thin cords on my balsa warbird.
- EVA/Neoprene foam padding: Cushions contact points to prevent scratches and dents.
- Pool noodles for wing cradles: Cost-effective padding that conforms to wing contours and protects edges.
- Heat-shrink or silicone sleeves for hooks: Adds a protective layer over metal hooks to avoid chafing and damage to lines or wiring.
- Carabiners: Quick-release connectors facilitating easy installation and removal of planes.
- Quick links: Reliable locked connectors for secure rigging.
- Measuring tape: Ensures precise placement and equal suspension points for level hanging.
- Level: Verifies your plane is hung straight for optimal display and balance.
- Screwdriver/drill: Necessary tools for installing hardware securely into studs or anchors.
- Safety glasses: Protect your eyes while drilling or installing hardware.
When selecting hardware, always use load-rated hardware with a 2–3x safety factor to avoid unexpected failures. For delicate balsa or foam models, prefer wide straps and abundant foam padding wherever the model touches suspension points to distribute stress and prevent damage.
Large-Scale Aircraft Hanging Tips
For large models, such as giant-scale RC planes featured on sites like SwellRC Big RC Plane Kits, consider multiple suspension points to evenly distribute weight and avoid excessive strain on any single point.
You might also employ spreader bars or dual-hook racks for stability, using heavy-duty anchors and hardware rated well above total weight.
Ultra-Light Builds (Indoor Foamies or Micro Planes)
Ultra-light indoor models demand a minimalist approach: use small, unobtrusive ceiling hooks for model aircraft and feather-light lines to avoid overt tension and maintain ease of removal, as detailed in this guide on Super Light RC Indoor Planes. Lightweight suspension minimizes interference and ensures the delicate airframes stay pristine.
Step-by-Step Guide — How to Hang RC Planes
Before you begin with any hanging system for your RC planes, always start with a comprehensive pre-check: remove the batteries to prevent any accidental power-on, secure or remove the prop spinner/propeller to ensure safety—learn how to install or remove/secure propellers safely. Protect any sharp edges to avoid damage or injury, and importantly, confirm the center of gravity (CG) so you can balance the hang points correctly—this is crucial when considering the plane’s balance and CG on any hanging system. If swapping storage props, be sure to review tips on how to select the right prop size and pitch for optimal propeller safety.
Now, here are two clear pathways for displaying your cherished models using the most effective hanging systems for balsa models:
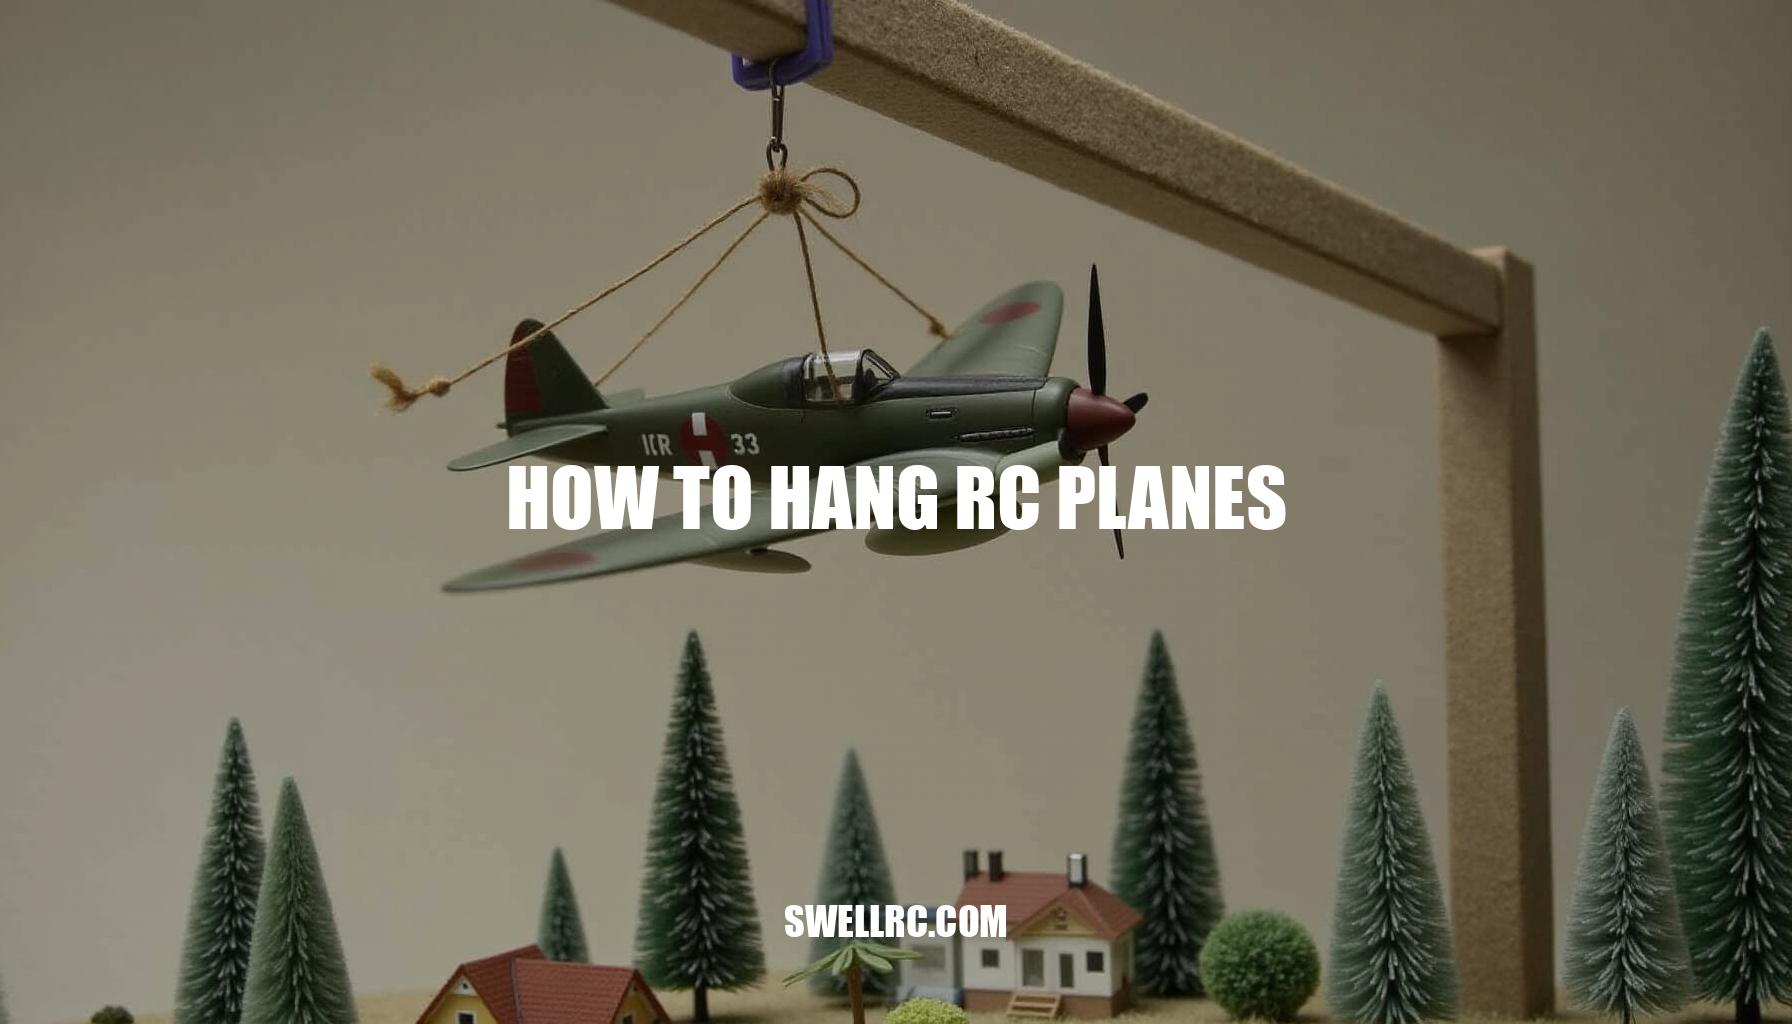
A) Ceiling Hanging
- Locate ceiling joists with a stud finder, and mark two anchor points that align either with the fuselage or wing root span. This ensures secure support without stressing the wings.
- Pre-drill holes and install load-rated eye bolts; individually test each to confirm they can handle the weight.
- Add padding to slings or hanging lines to prevent scratching or pressure damage on delicate surfaces.
- Tie adjustable loops or employ carabiners so you can fine-tune the suspension length for perfect leveling.
- Hang the model from strong fuselage points or landing gear blocks—avoid suspending from mid-wing to prevent structural stress.
- Perform a gentle spin-test by rotating the plane slightly to check for wobble; adjust hang points until it remains level.
- Complete a final safety check by tug-testing each anchor to at least twice the aircraft’s weight for peace of mind.
Personal note: After my first attempt sagged the tail, I shifted one ceiling anchor point forward by 2 cm and the plane leveled perfectly—a small tweak making a big difference in stability!
B) Wall Rack Displays
- Identify wall studs for solid mounting, and set rack height to ensure protection of both wings and propeller.
- Install two padded arms or a padded shelf cradle designed to snugly fit the fuselage without pressure points.
- Add a soft strap around the fuselage to prevent any risk of rolling off the rack.
- Ensure the propeller is removed or immobilized for safe display.
- Verify that no control horns or servo arms are pressed under load to avoid mechanical damage.
- Level and align the rack with neighboring models to create a clean, organized gallery display.
Whether you’re learning how to hang RC planes from ceiling or installing wall mounts for RC planes, focusing on secure attachment points and proper balance will keep your planes safe and showcase them beautifully. Taking time on propeller safety and understanding the balance and CG will further ensure longevity and an impressive presentation of your collection.
Creative Display Techniques for RC Planes
For enthusiasts looking to elevate their creative RC plane display to a professional level while ensuring optimal protection of delicate airframes, consider multiple innovative ideas. Start with museum-style ceiling lines that sort aircraft by wingspan, offering a transparent overview akin to aviation museums. This arrangement not only maximizes space but also provides an eye-catching visual narrative.
On your walls, group models into “squadrons” based on era — such as WWII fighters — or roles like trainers versus EDFs, enabling an immersive, thematic experience.
Take displays a notch higher by suspending flight formations at staggered heights, mimicking dynamic aerial maneuvers. Using 3D-printed brackets or custom-shaped cradles that perfectly match fuselage contours not only enhances aesthetic appeal but adds robust protection. For fabrication inspiration on these brackets, explore this comprehensive guide.
Complement these setups with hybrid racks featuring illuminated shelves, ideal for displaying radios and batteries securely. Portable pegboard arms with padded hooks offer flexibility and easy access while preventing scratches.
For micro or paper builds, which require extra care, consider compact indoor displays like shadow boxes or clear acrylic cases. These options keep your delicate models dust-free and visible, with a beautiful aesthetic layer. See practical examples and tips at this detailed resource.
| Display Setup | Cost | Space Efficiency | Build Difficulty |
|---|---|---|---|
| Museum Ceiling Lines by Wingspan | Medium | High | Medium |
| Wall Squadrons Grouped by Era or Role | Low | Medium | Low |
| Suspended Flight Formations with 3D-Printed Brackets | High | Medium | High |
| Hybrid Racks with Lit Shelves | Medium | Medium | Medium |
| Portable Pegboard Arms with Padded Hooks | Low | High | Low |
| Shadow Boxes or Clear Acrylic Cases (Micro/Paper Builds) | Medium | Low | Low |
Inject your personality into your displays: feature nose-up climb poses, create miniature runway diorama shelves, or use color-coordinated straps to add vibrancy and uniqueness. Above all, prioritize protection by always padding contact points and avoiding UV hotspots that may degrade paint or materials over time.
Implementing these DIY RC airplane wall rack ideas and leveraging 3D printing & custom fabrication will result in a gallery that’s both stunning and safe — an inspiring tribute to your passion.
Troubleshooting & Safety Tips
When it comes to ensuring the safety and longevity of your prized RC planes, understanding common mounting issues and their fixes is essential. Here are some practical solutions to keep your hobby equipment secure and well-maintained:
- Uneven balance: Shift one hang point toward the center of gravity (CG) or add a second sling under the tail boom to distribute weight evenly, an effective uneven balance fix.
- Pressure dents: Insert wider padded cradles or use pool-noodle sleeves to protect the plane’s surface from dents caused by pressure points.
- Mount slippage: Upgrade to heavier-duty anchors; heat can loosen some plastics, so choose metal hardware and retighten seasonally to prevent falling mounts.
- Draft sway: Shorten suspension lines or add a discreet stabilization tether. Always consider airflow patterns in garages to enhance airflow and sway control.
- Limited ceiling height: Switch to low-profile wall racks to maximize limited space, a smart limited space solution.
- Dust and sun exposure: Install protective covers, select shaded walls for hanging, and rotate displays monthly to minimize damage.
After one of my mounts slipped mid-summer due to heat-induced hardware creep, I swapped to stainless steel eye bolts and hooks with silicone sleeves—no more creep or surprise falls!
This experience reinforced the importance of adhering to reliable RC plane safety tips.
Additionally, retrieval mishaps can be a concern when flying near wooded areas. For helpful prevention methods and safe climbing advice, refer to the comprehensive guide at SwellRC’s guide on retrieving RC planes from trees. If drafts or varying breezes are challenging your suspended models, increasing your understanding of wind dynamics is key.
Explore wind-awareness fundamentals at SwellRC’s wind flying tips to manage airflow effects around your displays.
Regardless of your setup, always perform a weight-rated tug-test before hanging any prized model and diligently log hardware install dates for timely checks and maintenance. Following these guidelines will help you maintain secure, attractive displays while ensuring your RC planes stay protected and ready to fly.
Advanced Tips for Collectors
To achieve pro-level organization in your collector RC storage, begin by clearly labeling each aircraft with detailed specs and center of gravity (CG) markings. Hang a laminated pre- and post-flight checklist near display zones to ensure consistent aircraft handling. For optimal lighting and photography, install LED track lighting with a high Color Rendering Index (CRI) to capture accurate colors during photo sessions.
Incorporate climate control by maintaining 40–55% relative humidity (RH) and stable temperatures to enhance preservation for foam and balsa, minimizing warping and degradation. Applying UV film on windows and using dust covers for long-term hangs further protects delicate materials. We recommend photographing setups quarterly to identify any sagging or twisting over time.
Segment your displays by aircraft role or build material, considering the following protective differences:
- Balsa models: Use wider cradles to reduce stress points.
- Foam models: Employ padded supports to cushion easily dented surfaces.
- Composite builds: Support at rigid points for secure display.
For collection planning and inspiration, explore model staples at https://www.swellrc.com/essential-rc-planes/.
By integrating these strategies—robust labeling systems, controlled climate, specialized lighting and photography setups, and tailored preservation methods—you can maintain and showcase your RC aircraft collection at its finest.
Conclusion — Give Your RC Planes the Space They Deserve
Transforming cluttered shelves into a safe, stylish hangar truly lights up the passion to fly more often. Learning how to hang RC planes isn’t just about display-worthy storage; it’s a protective, rewarding process where your models stay straight, dent-free, and always ready for takeoff. Why not start this weekend?
Pick one plane and test a ceiling or wall hanging method that suits your space. Remember to revisit the balance and padding basics, experiment with creative formations, and keep up with routine safety checks to ensure safe mounting every time.
As you refine your technique, here are some tips to keep in mind:
- Assess the best way to store RC planes at home to maximize space and accessibility.
- Focus on hobby inspiration by designing your hangar to reflect your unique style.
- Continuously check mounting points for security and adjust padding to avoid damage.
Embrace the journey, share photos of your setup, and keep experimenting—because the perfect display is the one that keeps you smiling and your fleet flight-ready. Happy flying!
Frequently Asked Questions
- What is the safest way to hang an RC plane from the ceiling?
Use load-rated eye bolts anchored into joists (not drywall), wide padded slings at structural points (fuselage/wing root), and a 2–3x safety factor. Balance at or near the CG, tug-test each anchor above the model’s weight, and add a secondary safety tether. - How do I store my RC plane without damaging the wings or propeller?
Avoid point loads on thin wing skins; support the fuselage or wing root with padded cradles. Remove or immobilize the propeller, protect control surfaces from pressure, and keep models away from direct sun and high humidity. - Can I use fishing line or wire to hang RC planes?
Yes, but choose UV-resistant heavy test line or coated cable and use it with padded contact points. Thin wire can bite into foam or balsa—use wide slings where the airframe touches. Always match or exceed weight ratings and add a backup tether. - How do you display large RC planes in small spaces?
Use dual-point ceiling hangs with short lines, low-profile wall racks across studs, or nose-up vertical cradles to save floor area. Distribute weight over multiple padded supports and keep access clear for safe handling. - Should I remove the propeller before hanging an RC airplane?
It’s best practice. Removing or securely immobilizing the prop reduces injury risk and prevents bending the shaft or spinner. If you keep it on, use a prop cover and ensure nothing rests against it.