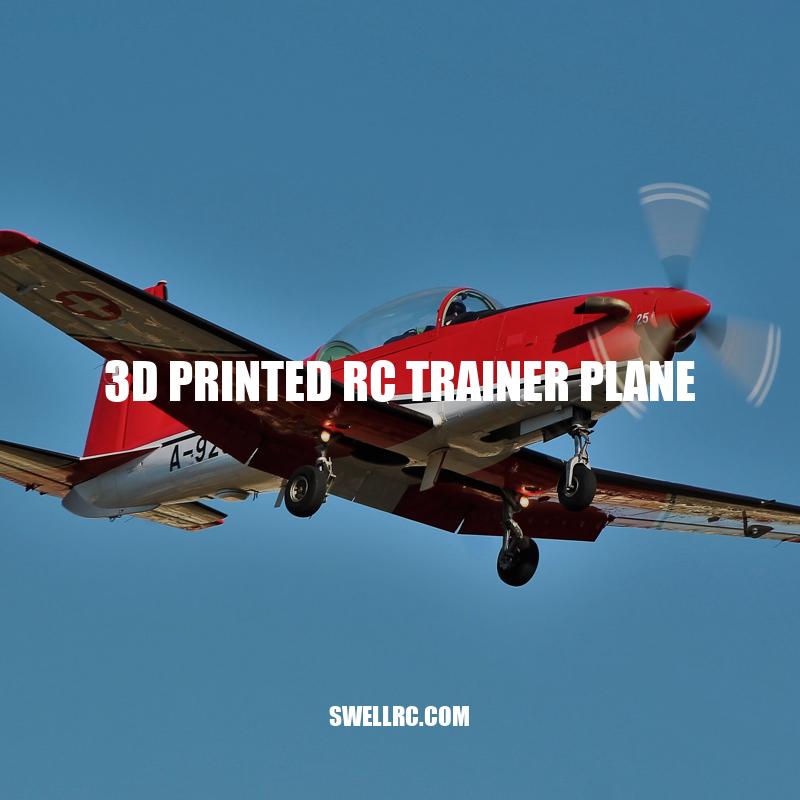
Building a 3D Printed RC Trainer Plane: A Beginner’s Guide
3D printed RC trainer planes are an exciting and innovative creation born out of the advancement in 3D printing technology. These planes can be designed and printed at home, making it accessible for anyone with a 3D printer to bring it to life. The use of 3D printing technology allows for the creation of unique, customizable, and lightweight planes with superior aerodynamics that can outperform its counterparts. The design process starts with 3D modeling software that is used to create the plane’s shape, which can be adjusted to suit a beginner’s needs. The materials used for printing can vary, but popular choices include PLA and ABS plastic, which are durable and lightweight.
One of the advantages of printing an RC trainer plane is its flexibility. Modifications and corrections can be made during the design process to adapt to different user needs. For example, the wingspan can be adjusted for stability, or the fuselage can be modified to accommodate different battery and motor dimensions. These planes can also be customized with personal designs or logos unique to the user.
Assembling a 3D printed trainer plane requires careful attention to detail and patience. Step-by-step instructions should be followed closely, and safety precautions should be taken when handling tools such as a hobby knife or scissors. When it’s time to test the plane, it’s essential to find an open space free of obstacles or people to avoid accidents.
In conclusion, 3D printed RC trainer planes offer an exciting opportunity for beginners to hone their RC flying skills. The ability to design, print, and assemble a unique and custom plane while using cutting-edge technology makes 3D printed trainer planes an attractive and rewarding project for anyone interested in the RC hobby.
Designing and printing a 3D printed RC trainer plane requires a few steps and considerations. Here are some tips to get started:
- First, determine the size and shape of the plane.
- Then, download or create a 3D model and save it in a 3D printing software.
- Adjust the size, shape, and settings of the model. For example, the planes’ wingspan should be made wider for added stability.
- Select the appropriate materials, such as PLA or ABS plastic, to print the plane.
- Start printing the individual sections of the plane and assemble them carefully.
- If you don’t have access to a 3D printer, you can purchase 3D printed RC trainer planes online from websites like Thingiverse or HobbyKing.
It’s essential to ensure that the 3D printed trainer plane is lightweight and aerodynamically stable. Therefore, designing and printing should be done with precision and careful attention to detail. Some websites offer free RC plane designs that can be downloaded or purchased. Thingiverse, for example, provides more than a thousand free designs from enthusiasts worldwide. On the other hand, HobbyKing provides a wide range of 3D printed planes that can be purchased from their website.
How do you fly a RC trainer plane?
To fly an RC trainer plane, follow these basic steps:
- Check the batteries, controls, and the receiver before starting your flight.
- Practice with simulator software or a remote-controlled flight trainer device before flying the actual plane.
- Take off by gradually increasing the throttle and ensure the plane is level and steady while gaining altitude.
- Use the control surfaces to adjust the plane’s attitude for different maneuvers such as turns, climbs, and descents.
- Land the plane smoothly by slowly decreasing the throttle and having the wings level prior to landing.
If you want more detailed information, there are many websites and forums dedicated to RC flying. HobbyKing and Horizon Hobby provide a range of RC trainer planes and accessories.
3D printed RC trainer plane is an exciting hobby for anyone who loves aviation and technology. Assembling a 3D printed trainer plane can be a bit challenging, but with patience, it can be done. The following steps and tips can help with the assembly process.
To begin, it is important to sort the printed parts into separate sections for easier access. Carefully sand and smooth out the edges of each section to avoid any rough surfaces that may disrupt the flying stability. Following the instructions provided for the 3D printed trainer plane or looking up tutorials online can guide the process.
Using a model glue, assemble the sections, but be careful not to use too much as it can weigh down the plane making it harder to fly. It is vital to check the balance and weight distribution of the plane to ensure that it’s well-balanced.
Patience is necessary when assembling a 3D printed trainer plane. Rushing can lead to errors in the process that could affect the plane’s stability and performance. Always take time to check and double-check before moving on to the next step.
Below is a table summarizing the tools required for assembling a 3D printed trainer plane:
| Tool | Function |
|---|---|
| Sandpaper | For smoothing out rough edges of the printed parts. |
| Model glue | For assembling the parts. |
| Model knife | For trimming and cutting the printed parts. |
| Scissors | For cutting decals, stickers, and other decorative parts. |
In summary, 3D printed RC trainer planes are an exciting and interesting way to combine technology and aviation. Following the steps and tips outlined above can help with the assembly process. Just remember, patience and attention to detail are essential to create a well-balanced and stable plane. For anyone interested in learning more about this hobby or purchasing a 3D printed trainer plane, check out websites like 3DHubs or MakerBot.
Is possible to use a 3D printer to create structural airplane parts?
Yes, it is possible to use a 3D printer to create structural airplane parts. In fact, some aircraft manufacturers are already using 3D printing technology to produce airplane components, including Boeing and Airbus.
Advantages of using a 3D printer for creating structural airplane parts include reduced weight, improved durability, and increased design flexibility. However, it is important to note that regulations require these parts to undergo rigorous testing and certification before they can be approved for use in commercial aircraft.
Some companies that specialize in aerospace 3D printing include Stratasys and EOS. Both offer a range of materials specifically designed for aviation applications, such as high-strength polymers and metal alloys.
3D printed RC trainer plane is a great way for hobbyists to enter the world of radio-controlled aircraft. 3D printing technology has enabled enthusiasts to design and create their own planes with ease. The process involves printing the various components of the plane using a 3D printer and assembling them to create a functional plane.
The great advantage of 3D printed planes is that they offer virtually limitless design possibilities. Enthusiasts can choose from a wide range of available designs or create their own customized planes using 3D modeling software.
After assembling your 3D printed trainer plane, the next step is to perform a flight test. Here are some tips to ensure optimal performance:
- Perform the test on a calm day with little to no wind.
- Check the balance of the plane and the weight distribution. You can do this by placing your fingers under the wings and checking if it’s levelled.
- Check the control surfaces to make sure they move freely. Adjust or reattach the surfaces if necessary.
- Start with low throttle and slowly increase the speed.
- Be prepared to make adjustments during the flight if necessary, such as correcting the plane’s level or increasing/decreasing the throttle.
It’s important to note that a trainer plane may experience stalls or crashes during the initial flights. Don’t be discouraged, as this is normal and part of the learning experience. Keep practicing, adjusting and improving your flight skills.
For those interested in purchasing 3D printed trainer planes or looking for design inspiration, there are websites such as Thingiverse, MyMiniFactory and Cults3D that offer a wide range of free and paid designs. Additionally, there are various communities and forums, such as the RC Groups forum, where hobbyists can share their experiences and offer advice to fellow enthusiasts.
What is the flight test process?
The flight test process is a complex and detailed process that involves testing new aircraft designs and modifications. It typically involves a team of engineers and pilots who work together to evaluate the aircraft’s performance and capabilities. The process can be broken down into several phases, including ground testing, flight testing, and certification.
During ground testing, the aircraft is tested on the ground to ensure that all of its systems are functioning properly. This includes testing the engines, avionics, and other systems. Once the aircraft passes these tests, it is ready for flight testing.
Flight testing involves taking the aircraft into the air and testing its performance, handling, and other capabilities. This can involve a wide range of tests, including testing the aircraft’s speed, range, and maneuverability.
The final phase of the flight test process is certification. This involves obtaining approval from regulatory authorities such as the Federal Aviation Administration (FAA) to operate the aircraft in commercial service. The certification process can vary depending on the type of aircraft and the regulatory authority involved.
For more information on the flight test process, you can visit websites such as the FAA’s Aircraft Certification website or the National Aeronautics and Space Administration’s (NASA) Flight Research Center.
Conclusion
In conclusion, 3D printing technology has revolutionized the way RC hobbyists design, build and fly their planes. By creating a 3D printed trainer plane, beginners can benefit from a custom and unique plane that fits their needs and skills. With the flexibility and freedom that 3D printing offers, hobbyists can design and print their planes from the comfort of their homes.
As with any RC aircraft, safety measures should always be taken. It’s important to follow proper assembly instructions, flight regulations and to always wear safety gear. By starting with a trainer plane, beginners can gradually build their skills and move up to more complex planes.
Whether you’re a seasoned RC hobbyist or just getting started, consider building a 3D printed trainer plane for a new and exciting flying experience. With the right design and fly testing, the possibilities are endless. So get started on your new hobby today!